在RHEL/CentOS 6.3/5.6和Fedora 17/12上安装APC
发布时间:2014-09-05 14:11:59作者:知识屋
在RHEL/CentOS 6.3/5.6和Fedora 17/12上安装APC

在Linux上安装和开启PHP APC
该说明文档描述了如何在RHEL 6.3/6.2/6.1/6/5.8/5.6,CentOS 6.3/6.2/6.1/6/5.8/5.6和Fedora 17,16,15,14,13,12上使用PECL命令从代码仓库中下载,安装以及开启APC。
安装APC的依赖包
首先,我们需要安装所需的软件包,pecl,phpize和apxs命令,并使用YUM包管理工具来安装APC。
yum install php-pear php-devel httpd-devel pcre-devel gcc make
使用PECL安装APC
现在我们已经安装了所有必须的软件包以用来安装APC。接下来我们使用PECL命令来安装它。安装过程中请选择默认的设置值。
pecl install apc
输出如下:
WARNING: channel "pecl.php.net" has updated its protocols, use "pecl channel-update pecl.php.net" to update
downloading APC-3.1.9.tgz ...
Starting to download APC-3.1.9.tgz (155,540 bytes)
.................................done: 155,540 bytes
54 source files, building
running: phpize
Configuring for:
PHP Api Version: 20090626
Zend Module Api No: 20090626
Zend Extension Api No: 220090626
config.m4:180: warning: AC_CACHE_VAL(PHP_APC_GCC_ATOMICS, ...): suspicious cache-id, must contain _cv_ to be cached
../../lib/autoconf/general.m4:1974: AC_CACHE_VAL is expanded from...
../../lib/autoconf/general.m4:1994: AC_CACHE_CHECK is expanded from...
config.m4:180: the top level
config.m4:180: warning: AC_CACHE_VAL(PHP_APC_GCC_ATOMICS, ...): suspicious cache-id, must contain _cv_ to be cached
../../lib/autoconf/general.m4:1974: AC_CACHE_VAL is expanded from...
../../lib/autoconf/general.m4:1994: AC_CACHE_CHECK is expanded from...
config.m4:180: the top level Enable internal debugging in APC [no] : Enable per request file info about files used from the APC cache [no] : Enable spin locks (EXPERIMENTAL) [no] : Enable memory protection (EXPERIMENTAL) [no] : Enable pthread mutexes (default) [yes] : Enable pthread read/write locks (EXPERIMENTAL) [no] :
开启PHP的APC扩展模块
运行下面的命令以开启APC扩展模块在Apache配置中
echo "extension=apc.so" > /etc/php.d/apc.ini
重启Apache服务
重启Apache服务以使新的更改生效。
service httpd restart
OR
/etc/init.d/httpd restart
验证APC安装是否成功
在Apache WEB服务根目录下创建一个phpinfo.php文件。例如/var/www/html/phpinfo.php
# vi /var/www/html/phpinfo.php
添加下面的代码到该文件,保存并关闭。
<?php
// Show all information, defaults to INFO_ALL
phpinfo();
?>
在浏览器中打开下面的URL链接。你将看到APC模块的开启配置项,如下面所示。
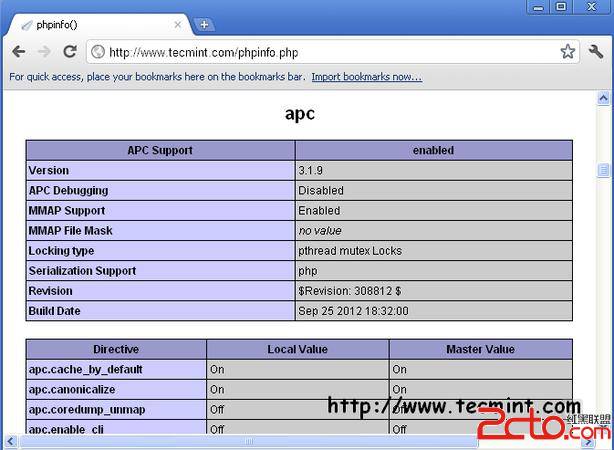
PHP APC Configuration Screen
开启PHP APC管理
开启APC管理面板,你需要复制下面的文件:
cp /usr/share/pear/apc.php /var/www/html/
接下来打开apc.php文件
# vi /var/www/html/apc.php
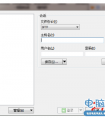
如下所示,在apc.php文件中设置用户名及密码。
defaults('ADMIN_USERNAME','apc'); // Admin Username
defaults('ADMIN_PASSWORD','Set-Password-Here'); // Admin Password - CHANGE THIS TO ENABLE!!!
在浏览器中输入如下的URL链接,你将可以使用APC的管理面板。
http://localhost/apc.php
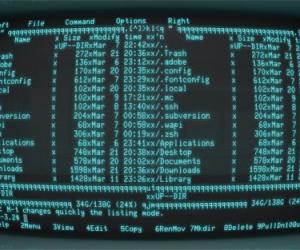
下面是一些APC管理面板的截图,以供你参考。
查看主机统计数据
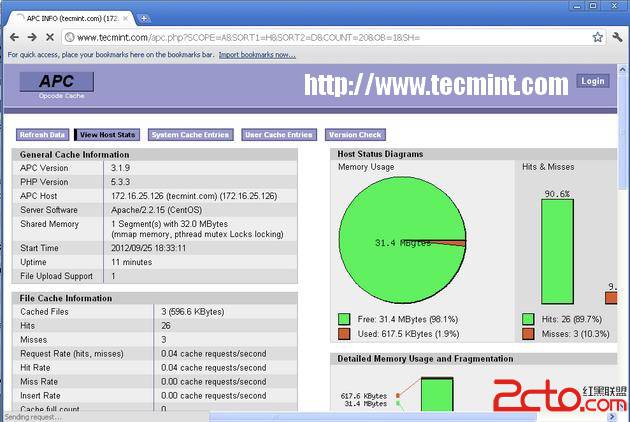
APC View Host Stats Overview
系统缓存条目

APC System Cache Entries Overview
用户缓存条目
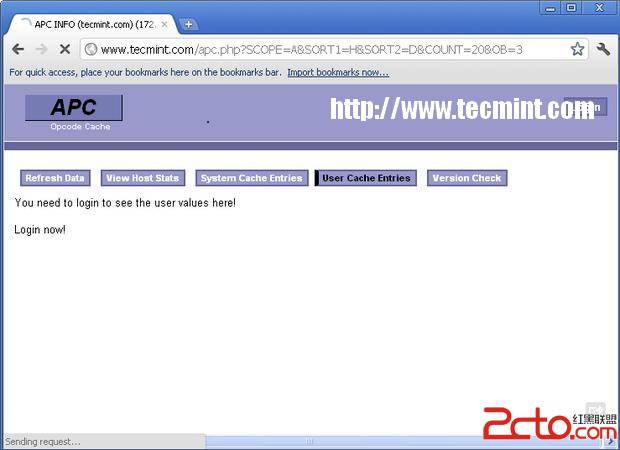
APC User Cache Entries Overview
APC登陆截图
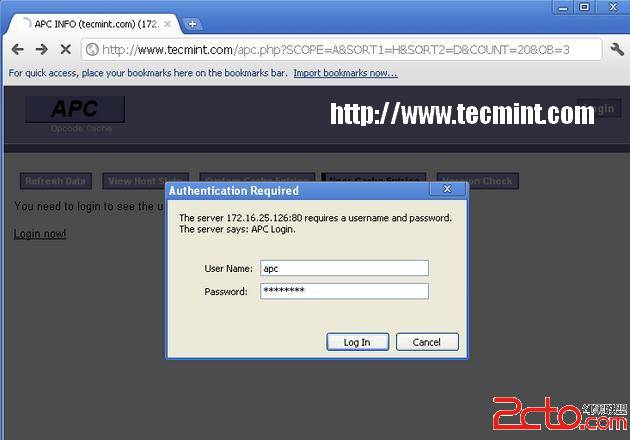
APC Admin Login Screen
APC版本检查
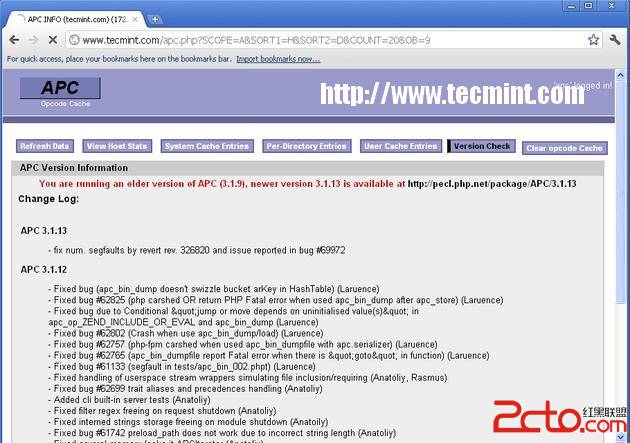
APC Version Check Overview
使用PECL升级APC
执行如下的命令即可下载并升级APC
pecl upgrade apc
使用PECL卸载APC
如果你想移除它,使用如下的命令即可从你的系统中完全移除APC。
pecl uninstall apc
(免责声明:文章内容如涉及作品内容、版权和其它问题,请及时与我们联系,我们将在第一时间删除内容,文章内容仅供参考)
相关知识
-
linux一键安装web环境全攻略 在linux系统中怎么一键安装web环境方法
-
Linux网络基本网络配置方法介绍 如何配置Linux系统的网络方法
-
Linux下DNS服务器搭建详解 Linux下搭建DNS服务器和配置文件
-
对Linux进行详细的性能监控的方法 Linux 系统性能监控命令详解
-
linux系统root密码忘了怎么办 linux忘记root密码后找回密码的方法
-
Linux基本命令有哪些 Linux系统常用操作命令有哪些
-
Linux必学的网络操作命令 linux网络操作相关命令汇总
-
linux系统从入侵到提权的详细过程 linux入侵提权服务器方法技巧
-

linux系统怎么用命令切换用户登录 Linux切换用户的命令是什么
-
在linux中添加普通新用户登录 如何在Linux中添加一个新的用户
软件推荐
更多 >


-
1
 专为国人订制!Linux Deepin新版发布
2012-07-10
-
2
CentOS 6.3安装(详细图解教程)
-
3
Linux怎么查看网卡驱动?Linux下查看网卡的驱动程序
-
4
centos修改主机名命令
-
5
Ubuntu或UbuntuKyKin14.04Unity桌面风格与Gnome桌面风格的切换
-
6
FEDORA 17中设置TIGERVNC远程访问
-
7
StartOS 5.0相关介绍,新型的Linux系统!
-
8
解决vSphere Client登录linux版vCenter失败
-
9
LINUX最新提权 Exploits Linux Kernel <= 2.6.37
-
10
nginx在网站中的7层转发功能