Arch Linux安装Xerox Phaser 3125N网络打印机备忘录
发布时间:2014-09-05 15:49:49作者:知识屋
配置 Xerox Phaser 3125N 打印机的 IP 地址
给 Xerox Phaser 3125N 打印机连接上网络线,并打开电源。按住打印机上 Cancel 键不放,直到打印机打印出 Configuration 页。记下其中的 MAC Address。然后在 Windows 主机上使用 Set IP 工具根据 MAC Address 配置 IP Address。
注意,Xerox Phaser 3125N 打印没有液晶屏,只有一个 Cancel 按钮,所以没有办法在打印机上配置 IP Address。
安装和配置 CUPS
按以下步骤进行:
$ sudo pacman -S --needed cups ghostscript gsfonts
$ sudo rc.d start cupsd
$ sudo vim /etc/rc.conf
( 增加 cupsd 到 DAEMONS )
$ sudo rc.d start cupsd
$ sudo vim /etc/rc.conf
( 增加 cupsd 到 DAEMONS )
下载 Xerox Phaser 3125N 打印机驱动
按以下步骤进行:
( http://www.support.xerox.com/support/phaser-3125/downloads-fx/enus.html?operatingSystem=win7x64 )
$ wget http://download.support.xerox.com/pub/drivers/3125/drivers/win7/pt_BR/Phaser_3125_W7.zip
$ wget http://download.support.xerox.com/pub/drivers/3125/drivers/win7/pt_BR/Phaser_3125_W7.zip
将 Phaser_3125_W7.zip 解压后,得到 Printer/PS/English/WinXP_VISTA_64/xp3125.ppd 文件。
在 CPUS 中添加 Xerox Phaser 3125N 打印机
在 Chromium 浏览器地址栏中输入 localhost:631,出现 Home - CUPS 1.6.1 页面。
点击 Adding Printers and Classes,出现 Administration - CPUS 1.6.1 页面。
点击 Add Printer,出现 Add Printer - CUPS 1.6.1 页面。
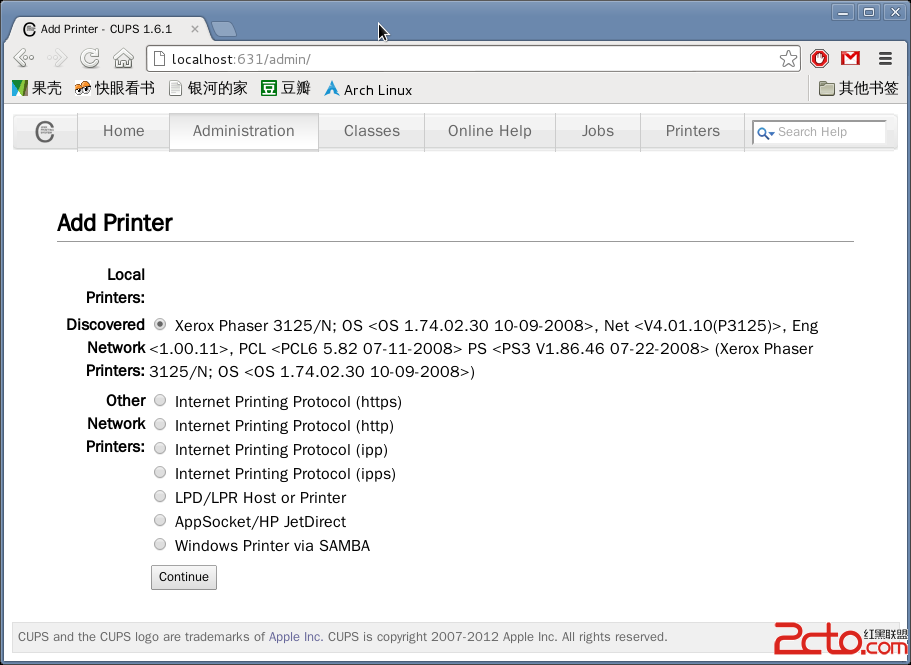

在上图中点击 Coutinue,出现 Add Printer - CUPS 1.6.1 的下一页面。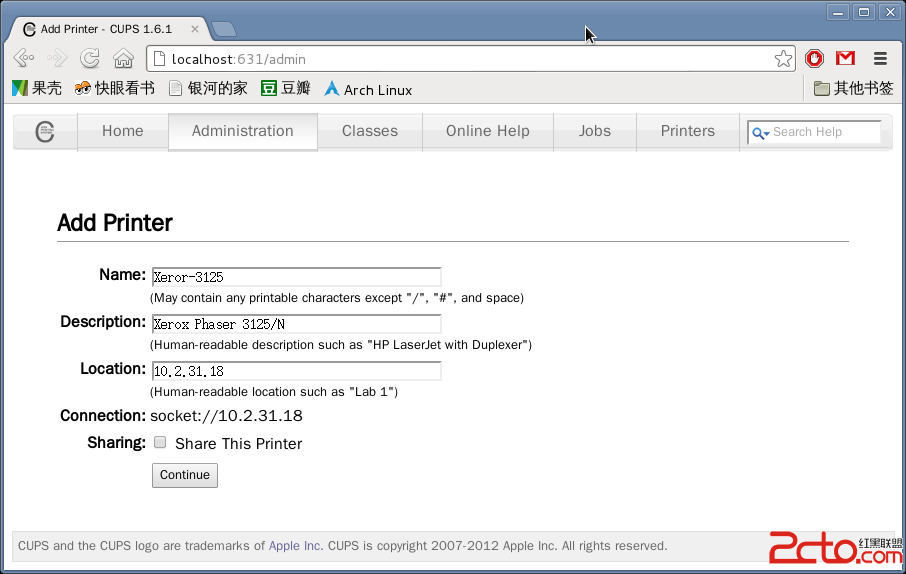

在上图中填入 Name、Description 和 Location 项目,然后点击 Coutinue,出现 Add Printer - CUPS 1.6.1 的下一页面。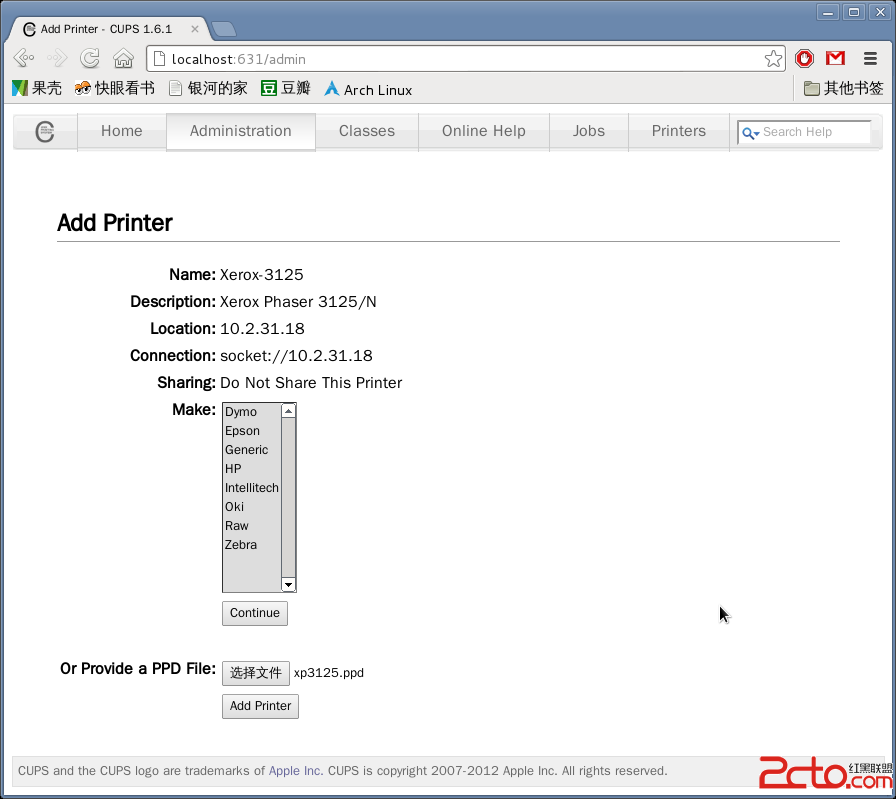

在上图中点击“选择文件”,选择上一步中得到的 xp3125.ppd 文件。再点击 Add Printer。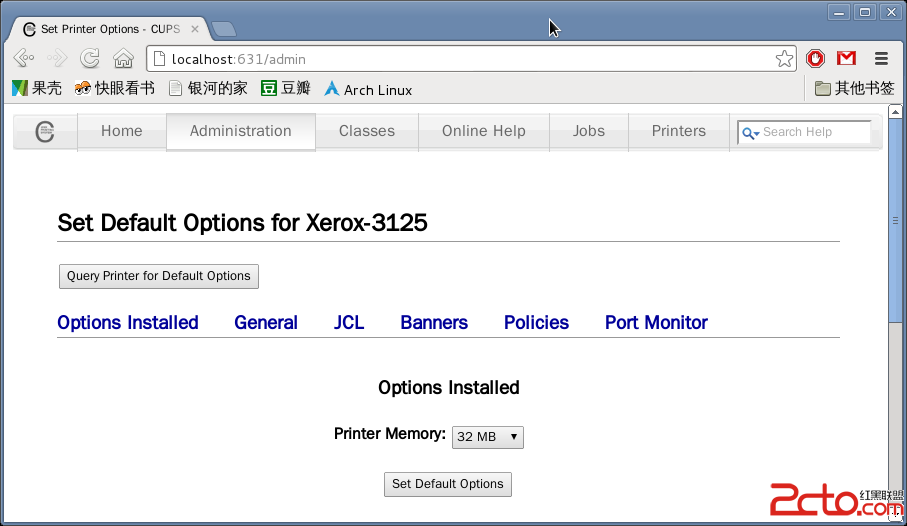

添加打印机完成。
点击 Home - CUPS 1.6.1 页面中的 Printers,出现 Printers - CUPS 1.6.1 页面。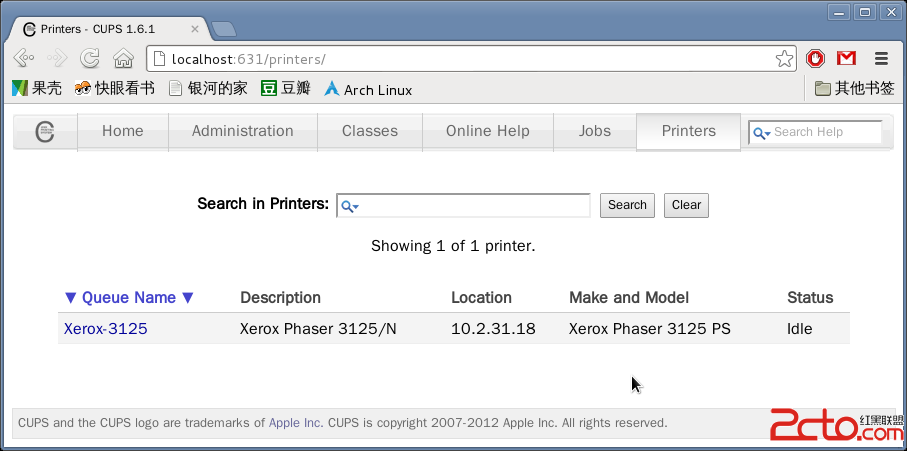

在上图中点击 Xerox-3125,出现 Xerox-3125 - CUPS 1.6.1 页面。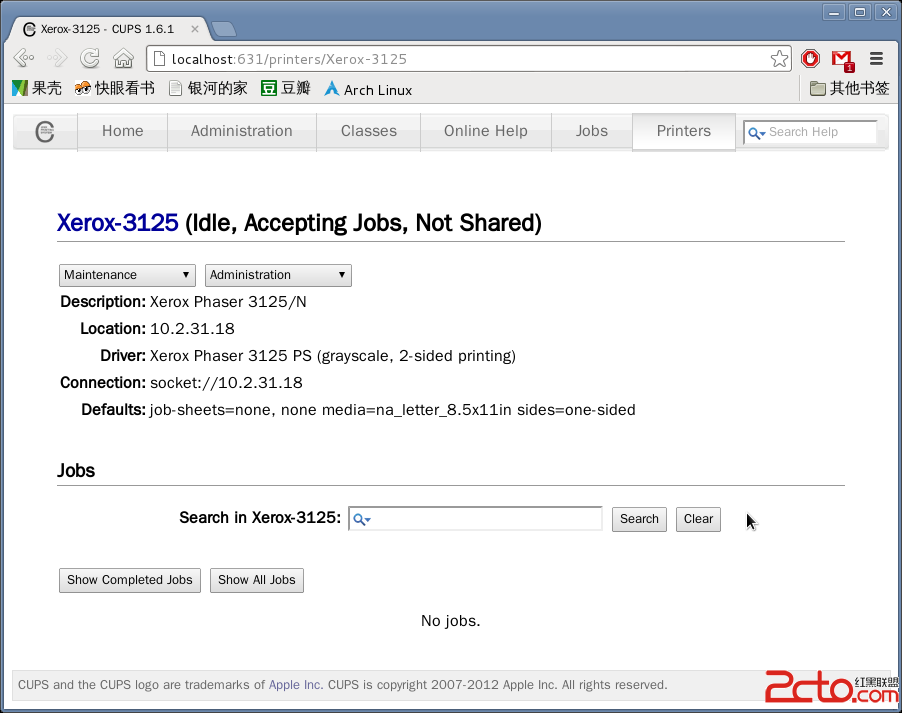

在上图中选择 Maintenance -> Set Default Options,出现 Set Printer Options - CUPS 1.6.1 页面。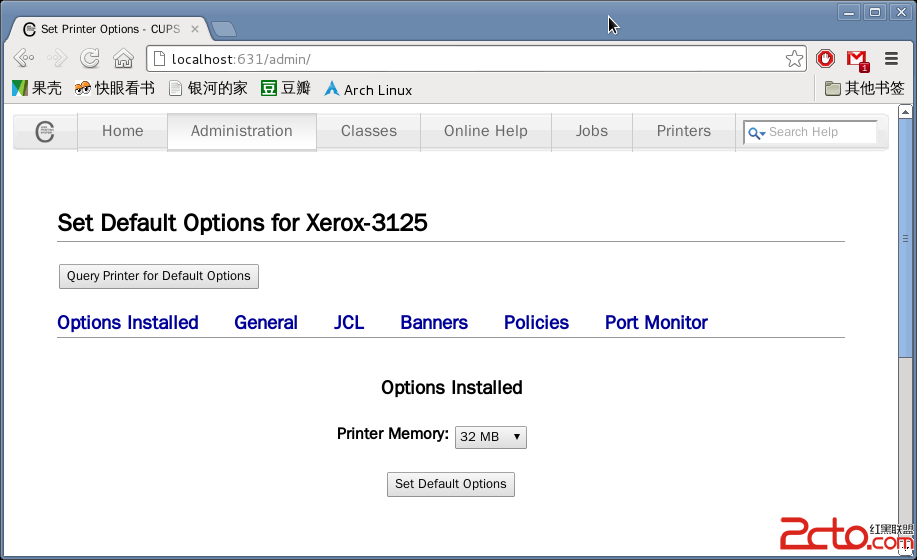

在上图中点击 General, 在出现的 General 页面中将 PageSize 改为 A4,再点击 Set Default Options 按钮。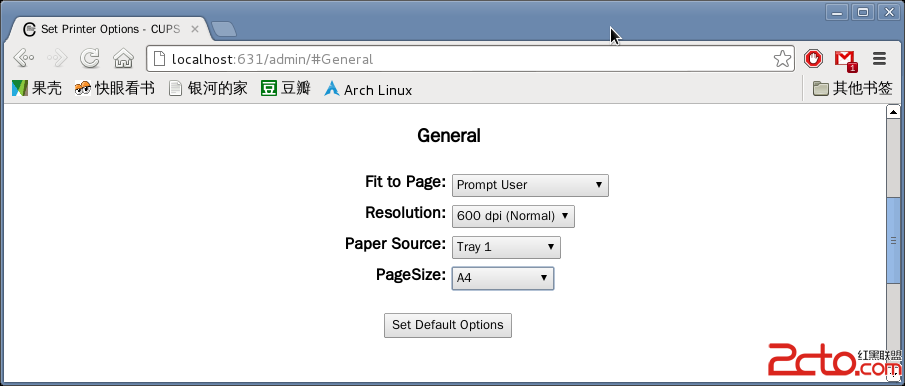

大功告成。
参考资料
ArchWiki: CUPS
Xeror: Phaser 3125 Support
Xeror Phaser 3125N A4黑白激光打印机
(免责声明:文章内容如涉及作品内容、版权和其它问题,请及时与我们联系,我们将在第一时间删除内容,文章内容仅供参考)
相关知识
-

linux一键安装web环境全攻略 在linux系统中怎么一键安装web环境方法
-
Linux网络基本网络配置方法介绍 如何配置Linux系统的网络方法
-
Linux下DNS服务器搭建详解 Linux下搭建DNS服务器和配置文件
-
对Linux进行详细的性能监控的方法 Linux 系统性能监控命令详解
-
linux系统root密码忘了怎么办 linux忘记root密码后找回密码的方法
-
Linux基本命令有哪些 Linux系统常用操作命令有哪些
-
Linux必学的网络操作命令 linux网络操作相关命令汇总
-

linux系统从入侵到提权的详细过程 linux入侵提权服务器方法技巧
-

linux系统怎么用命令切换用户登录 Linux切换用户的命令是什么
-
在linux中添加普通新用户登录 如何在Linux中添加一个新的用户
软件推荐
更多 >-
1
 专为国人订制!Linux Deepin新版发布
2012-07-10
-
2
CentOS 6.3安装(详细图解教程)
-
3
Linux怎么查看网卡驱动?Linux下查看网卡的驱动程序
-
4
centos修改主机名命令
-
5
Ubuntu或UbuntuKyKin14.04Unity桌面风格与Gnome桌面风格的切换
-
6
FEDORA 17中设置TIGERVNC远程访问
-
7
StartOS 5.0相关介绍,新型的Linux系统!
-
8
解决vSphere Client登录linux版vCenter失败
-
9
LINUX最新提权 Exploits Linux Kernel <= 2.6.37
-
10
nginx在网站中的7层转发功能


