Linux Nginx vs Lighttd vs Apache & Apache vs IIS7
发布时间:2014-09-05 16:34:57作者:知识屋
前文再续,话说历经《Windows下Apache VS Lighttpd VS Nginx(Ngwsx)静态文件对比》、《Windows下Zend Server VS Nginx VS Lighttpd PHP运行测试》,为了能更全面的展开Windows与Linux的各方面比较,我决定在同样的机器上安装Ubuntu Server。
为了四个现代化,我们要把测试进行到底!!

硬件环境
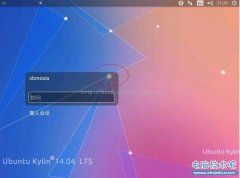
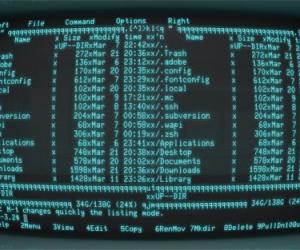
这也是我期待已久的测试,先附上Ubuntu Server环境的截图:
还是那台电脑,不过换了个硬盘装了Ubuntu Server。
WebServer安装
手动编译Nginx、Lighttpd、PHP,为了快速完成测试,编译所需的依赖包都是用apt-get install,其中Pcre手动编译,使用最新的8.21版本,编译和安装的指令摘录如下:
Nginx为最新的1.1.14,Lighttpd为14.30, PHP 5.3.10 ,Zend Server为5.6(自带的PHP为PHP 5.3.9,不过不是说这个版本的PHP有漏洞吗?难道Zend自己不知道?但是因为是Zend Server自己整合安装的,所以没法变更),。
Nginx依赖库
1
apt-get install zlib1g-dev libssl-dev libpcre3-dev libaio-dev
Nginx编译指令
01
./configure /
02
--prefix=/usr/local/nginx /
03
--conf-path=/etc/nginx/nginx.conf /
04
--with-file-aio /
05
--with-http_ssl_module /
06
--with-http_realip_module /
07
--with-http_flv_module /
08
--with-http_gzip_static_module /
09
--with-http_stub_status_module /
10
--with-pcre=/usr/local/pcre
Nginx摘要信息
01
Configuration summary
02
+ using system PCRE library
03
+ using system OpenSSL library
04
+ md5: using OpenSSL library
05
+ sha1: using OpenSSL library
06
+ using system zlib library
07
08
nginx path prefix: "/usr/local/nginx"
09
nginx binary file: "/usr/local/nginx/sbin/nginx"
10
nginx configuration prefix: "/etc/nginx"
11
nginx configuration file: "/etc/nginx/nginx.conf"
12
nginx pid file: "/usr/local/nginx/logs/nginx.pid"
13
nginx error log file: "/usr/local/nginx/logs/error.log"
14
nginx http access log file: "/usr/local/nginx/logs/access.log"
15
nginx http client request body temporary files: "client_body_temp"
16
nginx http proxy temporary files: "proxy_temp"
17
nginx http fastcgi temporary files: "fastcgi_temp"
18
nginx http uwsgi temporary files: "uwsgi_temp"
19
nginx http scgi temporary files: "scgi_temp"
Lighttpd依赖库
1
apt-get install libev-dev libev-libevent-dev libfam-dev libmemcache-dev libgamin-dev
Lighttpd编译指令
01
./configure /
02
--prefix=/usr/local/lighttpd /
03
--enable-lfs /
04
--disable-ipv6 /
05
--with-libev /
06
--with-pcre /
07
--with-zlib /
08
--with-bzip2 /
09
--with-fam /
10
--with-memcache
Lighttpd摘要信息
01
Plugins:
02
03
enabled:
04
mod_access
05
mod_accesslog
06
mod_alias
07
mod_auth
08
mod_cgi
09
mod_compress
10
mod_dirlisting
11
mod_evhost
12
mod_expire
13
mod_extforward
14
mod_fastcgi
15
mod_flv_streaming
16
mod_indexfile
17
mod_proxy
18
mod_redirect
19
mod_rewrite
20
mod_rrdtool
21
mod_scgi
22
mod_secdownload
23
mod_setenv
24
mod_simple_vhost
25
mod_ssi
26
mod_staticfile
27
mod_status
28
mod_trigger_b4_dl
29
mod_userdir
30
mod_usertrack
31
mod_webdav
32
disabled:
33
mod_cml
34
mod_magnet
35
mod_mysql_vhost
36
37
Features:
38
39
enabled:
40
auth-crypt
41
compress-bzip2
42
compress-deflate
43
compress-gzip
44
large-files
45
network-ipv6
46
regex-conditionals
47
stat-cache-fam
48
storage-memcache
49
disabled:
50
auth-ldap
51
network-openssl
52
storage-gdbm
53
webdav-locks
54
webdav-properties
PHP依赖库
1
apt-get install libmysqlclient-dev libxml2-dev libjpeg62-dev libpng12-dev libxpm-dev libfreetype6-dev libgd2-xpm-dev libmhash-dev libmcrypt-dev libevent-dev libbz2-dev curl libcurl4-openssl-dev libicu-dev autoconf libmemcached-dev libfcgi-dev libbz2-dev libltdl-dev
PHP编译指令
01
./configure /
02
--prefix=/usr/local/php-5.3.10 /
03
--enable-fpm /
04
--with-fpm-user=www /
05
--with-fpm-group=www /
06
--enable-fastcgi /
07
--with-openssl /
08
--with-pcre-regex=/usr/local/pcre /
09
--with-zlib /
10
--enable-bcmath /
11
--with-bz2 /
12
--enable-ftp /
13
--with-gd /
14
--with-mcrypt /
15
--with-jpeg-dir /
16
--with-png-dir /
17
--with-zlib-dir /
18
--with-xpm-dir /
19
--with-freetype-dir /
20
--enable-gd-native-ttf /
21
--with-mhash /
22
--with-curl /
23
--enable-intl /
24
--enable-mbstring /
25
--with-mysql /
26
--with-mysql-sock /
27
--with-mysqli /
28
--with-pdo-mysql /
29
--enable-shmop /
30
--enable-soap /
31
--enable-sockets /
32
--enable-zip /
33
--enable-calendar /
34
--enable-mysqlnd /
35
--with-pear /
PHP摘要信息
01
Installing PHP SAPI module: fpm
02
Installing PHP CLI binary: /usr/local/php-5.3.10/bin/
03
Installing PHP CLI man page: /usr/local/php-5.3.10/man/man1/
04
Installing PHP FPM binary: /usr/local/php-5.3.10/sbin/
05
Installing PHP FPM config: /usr/local/php-5.3.10/etc/
06
Installing PHP FPM man page: /usr/local/php-5.3.10/man/man8/
07
Installing PHP FPM status page: /usr/local/php-5.3.10/share/php/fpm/
08
Installing build environment: /usr/local/php-5.3.10/lib/php/build/
09
Installing header files: /usr/local/php-5.3.10/include/php/
10
Installing helper programs: /usr/local/php-5.3.10/bin/
11
program: phpize
12
program: php-config
13
Installing man pages: /usr/local/php-5.3.10/man/man1/
14
page: phpize.1
15
page: php-config.1
16
Installing PEAR environment: /usr/local/php-5.3.10/lib/php/
17
[PEAR] Archive_Tar - installed: 1.3.7
18
[PEAR] Console_Getopt - installed: 1.3.0
19
[PEAR] Structures_Graph- installed: 1.0.4
20
[PEAR] XML_Util - installed: 1.2.1
21
[PEAR] PEAR - installed: 1.9.4
22
Wrote PEAR system config file at: /usr/local/php-5.3.10/etc/pear.conf
23
You may want to add: /usr/local/php-5.3.10/lib/php to your php.ini include_path
24
/home/janpoem/php-5.3.10/build/shtool install -c ext/phar/phar.phar /usr/local/php-5.3.10/bin
25
ln -s -f /usr/local/php-5.3.10/bin/phar.phar /usr/local/php-5.3.10/bin/phar
26
Installing PDO headers: /usr/local/php-5.3.10/include/php/ext/pdo/
27
28
/usr/local/php-5.3.10/lib/php/extensions/no-debug-non-zts-20090626/
29
30
/var/tmp/xcache/mmap
31
/var/tmp/xcache/coredump
32
/var/tmp/xcache/coveragedump
题外话:被某人回复的某邮件气得吐血了,我表示深度的无语和失望。
补充说明,php-fpm就是fastcgi,具体我就不罗嗦了。PHP编译的基本指导原则是,安装日常开发中用到的模块,具体编译内容参见php编译指令部分。
不过由于当时忘记截图了,所以我这里简单罗列一下,mbstring、PDO、iconv、json、pcre、xcache(Zend Server用的是Zend自带的那个opcode缓存cache)等扩展。
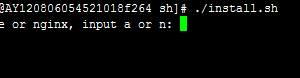
Zend Server安装,Zend Server的安装需要在官方网站下载一个脚本,这个脚本会为你添加Zend的更新源,然后通过远程下载的方式把Zend Server安装完毕。这个Zend Server比较讨厌,默认会给你装一大堆东西,也没有文档去说明究竟是些什么,好吧,暂时先不计较,继续测试。
测试的环境与方法
测试服务器为192.168.33.120,Web端口为80。执行AB的机器在另外一台Ubuntu Server上进行,ip为192.168.33.6。然后我会用自己的笔记本开两个putty,分别通过ssh登录两台服务器,192.168.33.120打开top监控系统资源和进程,192.168.33.6则用来执行AB的测试指令。这样确保每个终端都只负责各所司职的功能。
而测试的文件与之前相似,测试两个静态文件,3个php脚本。分别为:
- index.html,是新浪首页昨天的内容,大小在600kb左右。
- jquery-1.7.1.min.js,jQuery 1.7的压缩模式,这个不用介绍了。
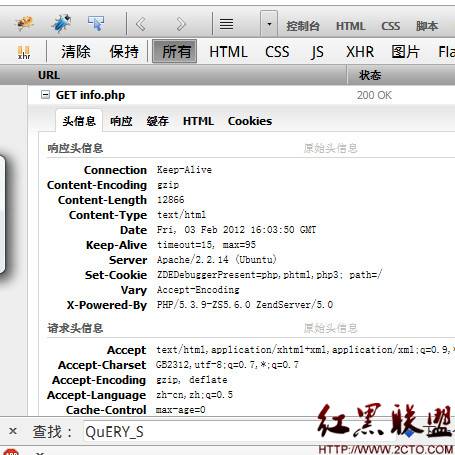
- info.php,具体参照:http://my.oschina.net/janpoem/blog/39846
- db.php,同上
- open.php,同上
测试的方法,也和之前一样:
10秒:ab -t 10 http://192.168.33.120/
并发测试:ab -c 100 -n 1000 http://192.168.33.120/
每个测试执行三次,然后记录下rps的结果。其中,-t 10模式,通过rps值 * 10即其总共完成的请求数。而-c 100 -n 1000,必100%须完成了1000次请求的,才算达标。
第一次测试结果
第一次测试,主要为了找出同等环境下,rps分值较高者,每个服务器都使用的是默认的基础配置,而PHP-FPM也设置了最小10个php-fpm进程,最大30。PHP-FPM是以Socket的方式,运行在127.0.0.1:9000上。
Nginx
| 10秒 | ||||
| index.html | jquery-1.7.1.min.js | info.php | db.php | open.php |
| 19.12 | 116.78 | 145.57 | 276.33 | 17.94 |
| 19.13 | 117 | 145.81 | 276.62 | 17.94 |
| 19.14 | 117.37 | 145.85 | 276.26 | 18.06 |
| 并发测试 | ||||
| index.html | jquery-1.7.1.min.js | info.php | db.php | open.php |
| 19.28 | 124.53 | 174.96 | 1273.61 | 19.21 |
| 19.3 | 124.54 | 175.1 | 1270.29 | 19.25 |
| 19.26 | 124.55 | 174.83 | 1269.34 | 19.27 |
Lighttpd
| 10秒 | ||||
| index.html | jquery-1.7.1.min.js | info.php | db.php | open.php |
| 19.12 | 116.99 | 145.6 | 270.69 | 18.46 |
| 19.11 | 117.01 | 145.63 | 271.21 | 18.43 |
| 19.13 | 117.01 | 145.38 | 270.73 | 18.48 |
| 并发测试 | ||||
| index.html | jquery-1.7.1.min.js | info.php | db.php | open.php |
| 19.28 | 124.65 | 175.01 | 1270.95 | 19.24 |
| 19.3 | 124.65 | 175.44 | 1281.82 | 19.23 |
| 19.28 | 124.65 | 175.29 | 1276.84 | 19.32 |
Zend Server 5.6, PHP 5.3.9, Apache 2.2.14
| 10秒 | ||||
| index.html | jquery-1.7.1.min.js | info.php | db.php | open.php |
| 19.06 | 114.07 | 114.96 | 236.97 | 18.12 |
| 19.06 | 114.75 | 114.62 | 237.15 | 18.12 |
| 19.06 | 114.84 | 114.53 | 235.41 | 18.12 |
| 并发测试 | ||||
| index.html | jquery-1.7.1.min.js | info.php | db.php | open.php |
| 19.32 | 122.93 | 143.83 | 1169.47 | 19.27 |
| 19.27 | 122.41 | 146.98 | 1172.19 | 19.29 |
| 19.26 | 123.08 | 147.41 | 1163.12 | 19.29 |
第一次测试结果总结
- Zend Server在Linux上的表现,远不如在Windows上抢眼,虽然,这分值比之Windows上的结果还要好,但比起他前面的两位小弟,还有很大的距离。
令人意外的,Apache的静态文件处理能力,并没有像想象中一般,被Nginx、Lighttpd远远的抛离,大页面上的表现,丝毫不逊,小文件上,只有2rps的落后。
PHP fastcgi的处理模式上,终归是Lighttpd和Nginx的成绩要好,而且差距很明显,不用再说了。
就这个结果而言,Lighttpd的结果比Nginx要略好一些,IO方面的稳定性更好些。如处理小文件,jquery-1.7.1.min.js,在高并发的条件下,居然连续三次跑的测试分值都是一样的,当然可能是碰巧,而open.php在-t 10模式下,rps也比nginx要略高一点点。
不过平心而论,Nginx和Lighttpd的差距可以忽略不计。
得出Nginx和Lighttpd是该次测试下的优胜者,故而决定加赛一场,对Nginx、Lighttpd、PHP-FPM都进行小量的优化,而后在进行同样的测试。
小范围优化
PHP-FPM方面,将listen的Socket模式改为文件模式,/dev/shm/php-fpm.sock,网上流传说,这个会大大的提高性能。
Nginx调优后的配置
01
user www www;
02
03
worker_processes 8;
04
worker_cpu_affinity 0001 0010 0100 1000 0001 0010 0100 1000;
05
worker_rlimit_nofile 102400;
06
07
#error_log logs/error.log;
08
#error_log logs/error.log notice;
09
#error_log logs/error.log info;
10
11
#pid logs/nginx.pid;
12
13
14
events {
15
use epoll;
16
worker_connections 102400;
17
}
18
19
20
http {
21
include mime.types;
22
default_type application/octet-stream;
23
24
#log_format main '$remote_addr - $remote_user [$time_local] "$request" '
25
# '$status $body_bytes_sent "$http_referer" '
26
# '"$http_user_agent" "$http_x_forwarded_for"';
27
28
#access_log logs/access.log main;
29
30
sendfile on;
31
tcp_nopush on;
32
33
#keepalive_timeout 0;
34
keepalive_timeout 60;
35
36
server_names_hash_bucket_size 128;
37
client_header_buffer_size 2k;
38
large_client_header_buffers 4 4k;
39
client_max_body_size 8m;
40
41
#gzip on;
42
43
tcp_nodelay on;
44
45
gzip on;
46
gzip_min_length 1k;
47
gzip_buffers 4 16k;
48
gzip_http_version 1.0;
49
gzip_comp_level 2;
50
gzip_types text/plain application/x-javascript text/css application/xml;
51
gzip_vary on;
52
53
server {
54
listen 80;
55
server_name localhost;
56
57
#charset koi8-r;
58
59
#access_log logs/host.access.log main;
60
61
location / {
62
root /srv/www;
63
index index.html index.htm index.php;
64
}
65
66
error_page 500 502 503 504 /50x.html;
67
location = /50x.html {
68
root html;
69
}
70
71
location ~ /.php$ {
72
root /srv/www;
73
fastcgi_pass unix:/dev/shm/php-fpm.sock;
74
fastcgi_index index.php;
75
fastcgi_param SCRIPT_FILENAME $document_root$fastcgi_script_name;
76
include fastcgi_params;
77
}
78
}
79
}
这个调优是根据这里的介绍调整的http://www.zhishiwu.com/os/201202/118474.html,不过很遗憾的是,fastcgi_cache部分配置始终不对,没法启用fastcgi_cache的扩展。
Lighttpd的调优配置如下:
001
server.document-root = "/srv/www"
002
server.port = 80
003
server.username = "www"
004
server.groupname = "www"
005
006
server.modules = (
007
"mod_rewrite",
008
"mod_redirect",
009
"mod_alias",
010
"mod_access",
011
# "mod_cml",
012
# "mod_trigger_b4_dl",
013
# "mod_auth",
014
"mod_status",
015
"mod_setenv",
016
"mod_fastcgi",
017
"mod_proxy",
018
# "mod_simple_vhost",
019
"mod_evhost",
020
# "mod_userdir",
021
"mod_cgi",
022
"mod_compress",
023
# "mod_ssi",
024
# "mod_usertrack",
025
"mod_expire",
026
# "mod_secdownload",
027
# "mod_rrdtool",
028
"mod_accesslog"
029
)
030
031
#accesslog.filename = "/usr/local/lighttpd/log/access.log"
032
033
mimetype.assign = (
034
".pdf" => "application/pdf",
035
".sig" => "application/pgp-signature",
036
".spl" => "application/futuresplash",
037
".class" => "application/octet-stream",
038
".ps" => "application/postscript",
039
".torrent" => "application/x-bittorrent",
040
".dvi" => "application/x-dvi",
041
".gz" => "application/x-gzip",
042
".pac" => "application/x-ns-proxy-autoconfig",
043
".swf" => "application/x-shockwave-flash",
044
".tar.gz" => "application/x-tgz",
045
".tgz" => "application/x-tgz",
046
".tar" => "application/x-tar",
047
".zip" => "application/zip",
048
".mp3" => "audio/mpeg",
049
".m3u" => "audio/x-mpegurl",
050
".wma" => "audio/x-ms-wma",
051
".wax" => "audio/x-ms-wax",
052
".ogg" => "application/ogg",
053
".wav" => "audio/x-wav",
054
".gif" => "image/gif",
055
".jar" => "application/x-java-archive",
056
".jpg" => "image/jpeg",
057
".jpeg" => "image/jpeg",
058
".png" => "image/png",
059
".xbm" => "image/x-xbitmap",
060
".xpm" => "image/x-xpixmap",
061
".xwd" => "image/x-xwindowdump",
062
".css" => "text/css",
063
".html" => "text/html",
064
".htm" => "text/html",
065
".js" => "text/javascript",
066
".asc" => "text/plain",
067
".c" => "text/plain",
068
".cpp" => "text/plain",
069
".log" => "text/plain",
070
".conf" => "text/plain",
071
".text" => "text/plain",
072
".txt" => "text/plain",
073
".dtd" => "text/xml",
074
".xml" => "text/xml",
075
".mpeg" => "video/mpeg",
076
".mpg" => "video/mpeg",
077
".mov" => "video/quicktime",
078
".qt" => "video/quicktime",
079
".avi" => "video/x-msvideo",
080
".asf" => "video/x-ms-asf",
081
".asx" => "video/x-ms-asf",
082
".wmv" => "video/x-ms-wmv",
083
".bz2" => "application/x-bzip",
084
".tbz" => "application/x-bzip-compressed-tar",
085
".tar.bz2" => "application/x-bzip-compressed-tar",
086
# default mime type
087
"" => "application/octet-stream",
088
)
089
090
static-file.exclude-extensions = ( ".php", "~" )
091
index-file.names = ( "index.html", "index.php" )
092
093
server.event-handler = "linux-sysepoll"
094
server.network-backend = "linux-sendfile"
095
server.stat-cache-engine = "fam"
096
server.max-keep-alive-requests = 0
097
098
099
#dir-listing.activate = "enable"
100
dir-listing.encoding = "utf8"
101
#dir-listing.show-readme = "enable"
102
103
compress.cache-dir = "/var/lighttpd/cache"
104
compress.allowed-encodings = ("bzip2","gzip","deflate")
105
compress.filetype = ("text/plain","text/html","text/javascript","text/css")
106
107
fastcgi.server = (
108
".php" => (
109
"localhost" => (
110
"socket" => "/dev/shm/php-fpm.sock",
111
# "host" => "127.0.0.1",
112
# "port" => 9000,
113
"docroot" => "/srv/www"
114
)
115
),
116
)
第二次测试结果
Nginx
| 10秒 | ||||
| index.html | jquery-1.7.1.min.js | info.php | db.php | open.php |
| 19.11 | 115.95 | 145.45 | 265.31 | 18.3 |
| 19.1 | 116.15 | 145.72 | 267.37 | 18.35 |
| 19.11 | 116.06 | 145.38 | 269.52 | 18.32 |
| 并发测试 | ||||
| index.html | jquery-1.7.1.min.js | info.php | db.php | open.php |
| 19.32 | 124.64 | 175 | 1288.84 | 19.27 |
| 19.25 | 124.64 | 175.17 | 1286.55 | 19.29 |
| 19.29 | 124.64 | 174.73 | 1286.36 | 19.28 |
Lighttpd
| 10秒 | ||||
| index.html | jquery-1.7.1.min.js | info.php | db.php | open.php |
| 19.09 | 115.89 | 145.62 | 271.86 | 18.48 |
| 19.1 | 115.93 | 145.77 | 269.88 | 18.48 |
| 19.1 | 115.88 | 145.68 | 269.12 | 18.48 |
| 并发测试 | ||||
| index.html | jquery-1.7.1.min.js | info.php | db.php | open.php |
| 19.26 | 124.5 | 175.27 | 1278.59 | 19.28 |
| 19.24 | 124.5 | 175.63 | 1285.4 | 19.28 |
| 19.22 | 124.5 | 175.62 | 1285.55 | 19.29 |
第二次测试结果总结
呃……
第二次的测试结果和第一次的测试结果,并没有太大的偏差,这个让人有些意外,但又觉得在情理之中。这个测试结果说明,这个数据已经是这台测试服务器下,最好的得分(最好的说法可能有些不妥,不过暂且这么一说),没有更多的硬件空间能让WebServer去挤压出更高rps出来。在这种情况,无论怎么调优,都不可能获得更好的测试结果。我想,如果换到更好的硬件环境下的服务器,可能才会获得更好的分数。
不过从Nginx的配置文件,可以看出,Nginx比较贴近新硬件的发展趋势,就是多核运算。他允许设置工作进程( worker_processes ),还允许分配不同的CPU核心。(诚如我在《Windows下Apache VS Lighttpd VS Nginx(Ngwsx)静态文件对比》,Ngwsx,开启了4个工作进程后,“但是高并发模式下,CPU占用高达25%,但是他也就是维持在25%,由于当时心急与想测试Lighttpd,没有注意看,他是不是将计算分摊到4个CPU的核心上了。”,这次我明确的看到,他允许为工作进程分配具体的CPU核心,说明他是可以将计算分摊到4个CPU的核心上了。)虽然Nginx具体表现上看似没有特别突出的表现,但是我相信换到更好的硬件环境里,具体的调优配置是会令他有更加出色的表现。
而相比之下,Lighttpd在运行过程中,始终是一个单进程的lighttpd在运行,他也不具备面向并行运算的可调优的着手点。而lighttpd,长久以来更新速度缓慢,几个年头过去了,还维持在14.x,这个实在是令人担忧这个产品的未来。
由于数据并没有较大的提升,所以,也不适合对他们进行比较了(只有在承受到更大的压力,通过数据的波动才能看出两者的差异)。
再再加时
貌似测试可以告一段落了,不过此时,Max(同事甲)人说:你的Zend Server是测试在Windows XP SP2,那个破烂怎么算数呢?你搞个Server版本的Windows测试来看看啊!好,再来一场加时赛!
Sam(同事乙)一阵忙,下载,刻碟,安装,Server 2008 安装ing.....安装完毕!这里就不罗嗦了,上个截图:
还是那台电脑,还是那个CPU,还是那个内存,变了个脸。不过Server 2008是32bit的,因为目前PHP主要都是32bit的。64bit,不是不行,但是都凌晨2、3点了,我可不想再在windows上手动编译PHP了。Sam冒着胃疼坚持着,我自信告诉他,一个小时,给我一个小时,绝对完成所有任务。
开始安装,IIS 7,+CGI,配置fastcgi,一顿忙...然后亮了,截个图:
因为通过第一、第二次的测试,我们已经得到想要的答案了,只是为了更加全面些,才加测试了Server 2008,所以IIS直接就开了gzip什么的。
Zend Server用的还是之前测试的那个版本(没装新的),直接打开原来C盘的Zend目录,打开Apache/bin/httpd.exe,弹出一个黑窗口,哦耶,截个图:
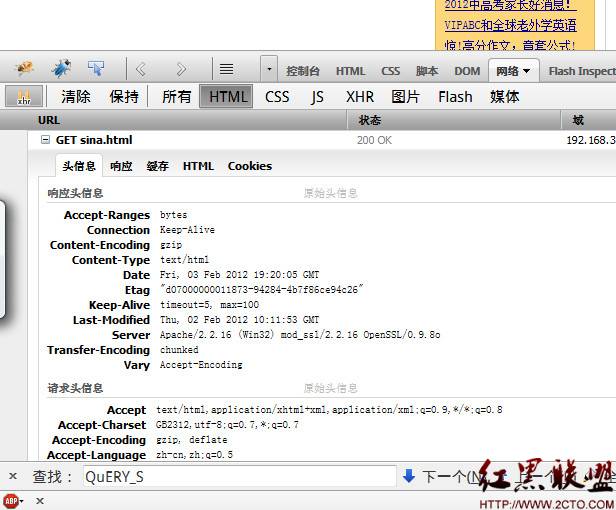
大家可能会很迷惑,说,你小子会不会拿个Ubuntu Server下的Zend Server来这里糊弄事啊?哎哟,那对比着下面这张图,和再下面的这张图看吧:
这是Ubuntu上的Zend Server,看出究竟了吗?
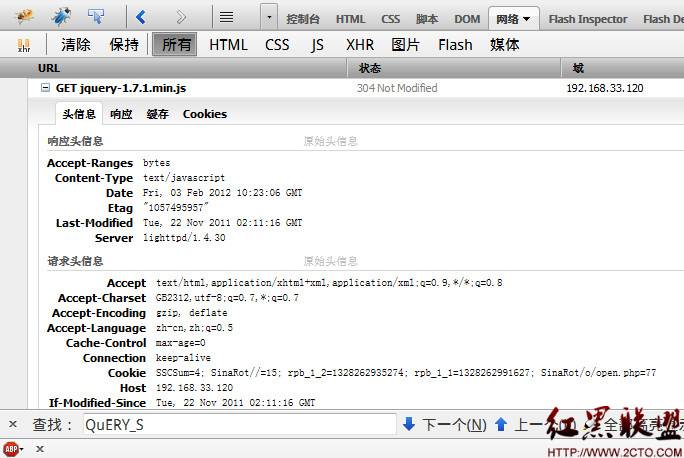
这是Ubuntu上的lighttpd截图。
由于Windows上的Zend Server,之前已经测试过,而且也调优过,所以也就不再罗嗦了。
第三次测试结果
IIS 7
| 10秒 | ||||
| index.html | jquery-1.7.1.min.js | info.php | db.php | open.php |
| 18.07 | 86.67 | 76.63 | 84.1 | 16.71 |
| 18.11 | 87.16 | 75.3 | 86.72 | 16.63 |
| 18.1 | 87.34 | 76.35 | 94.73 | 16.82 |
| 并发测试 | ||||
| index.html | jquery-1.7.1.min.js | info.php | db.php | open.php |
| 19.36 | 124.63 | 163.27 | 370.3 | 19.31 |
| 19.36 | 124.63 | 165.81 | 347.22 | 19.18 |
| 19.34 | 124.62 | 165.87 | 357 | 19.3 |
Zend Server(windows)
| 10秒 | ||||
| index.html | jquery-1.7.1.min.js | info.php | db.php | open.php |
| 16.03 | 77.88 | 76.62 | 65.29 | 17.19 |
| 16.03 | 78.03 | 77.73 | 63.93 | 17.24 |
| 16.13 | 78.52 | 76.94 | 69.12 | 17.21 |
| 并发测试 | ||||
| index.html | jquery-1.7.1.min.js | info.php | db.php | open.php |
| 19.34 | 124.35 | 134.83 | 941.01 | 19.34 |
| 18.9 | 124.43 | 135.51 | 995.14 | 19.31 |
| 19.29 | 124.34 | 134.37 | 1055.32 | 19.31 |
第三次测试结果总结
先说静态文件处理,没想到,IIS 7的成绩居然那么好,尤其是并发测试的结果(废话,Sam在旁边大叫,Zend Server是开外挂的,IIS那就是开内挂)。 虽然在-t的测试模式落后,但是一直被人诟病的Windows却在并发测试下和Linux的相差无二。连Apache也当仁不让,静态文件处理的RPS也优于xp的测试结果。
不过看php的处理方面,结果惨不忍睹啊,和Linux比,完全落后一大截。通过Windows和Linux在静态文件上所得到的相近的 RPS ,能够更加充分的说明,Windows绝对不是PHP运行的最佳环境。但是唯独一点有不同,就是IO的性能表现上。
“Windows的IO不如Linux”,这是一句我们常常看到人们在说的话题,可是事实上,通过open.php和index.html的对比测试结果可以看出,通过php的打开文件输出,其性能是接近WebServer输出的,当然他需要更大的开销。而通过横向对比5个测试结果,PHP在处理这种IO,在不同平台下的差异并没有那么大。而通过比较并发测试静态文件结果,也充分说明,Windows和Linux,在文件读取上,性能是接近的(当然,更好的硬件环境是不是会有差别呢?有待证实)。
当然,在测试数据以外的,是CPU使用率,系统剩余资源的情况,这方面我没有做截图比较,但是我去看服务器的时候,也会看到,Windows Server 2008在处理并发测试时,会有更高的CPU使用(远不似Linux下Nginx处理的那样平滑,而且可以多进程负载)。
最终总结
- 作为PHP运行环境的选择来说,Windows并不是最佳的平台。第三次测试的结果,充分的说明了这点(IIS和Windows下的Apache在并发测试中能与Linux的结果接近,但是PHP结果却远远不如)。
- 不能用快、慢这样的词汇去描述一个平台或WebServer,只有更合适的选择,更合适的搭配。而事实上,所谓快、慢从根本上、客观上,还是看你拥有多强大的硬件,你的硬件有多好,你的服务器就有多快。脱离硬件环境去比较任何的平台和WebServer都是傻B、2B的表性。
- 以面向未来、发展的角度来看(迎合各种新生事物,并发计算、多核计算、云计算、服务器集群),Nginx,以其轻巧(整个Nginx都很小巧)、整合程度(非动态加载插件的模式)、易于部署(他的配置可比Lighttpd要简单得多了)、面向多核计算的可配置型、强大的Proxy(这就是道听途说的了,目前还没机会测试到),Nginx是最具潜力的WebServer,也是Linux环境下的最好选择。
- Zend Server作为一个商业产品,无论在Windows平台,还是Linux平台,都落后其竞争对手,他不是一个划算的选择。尤其是Linux平台下,Zend Server会自带了很多莫名其妙的东西进来,这让人觉得很不放心。而Zend Server本身,在其发展的过程中,也曾爆出过几次较为严重的系统漏洞。
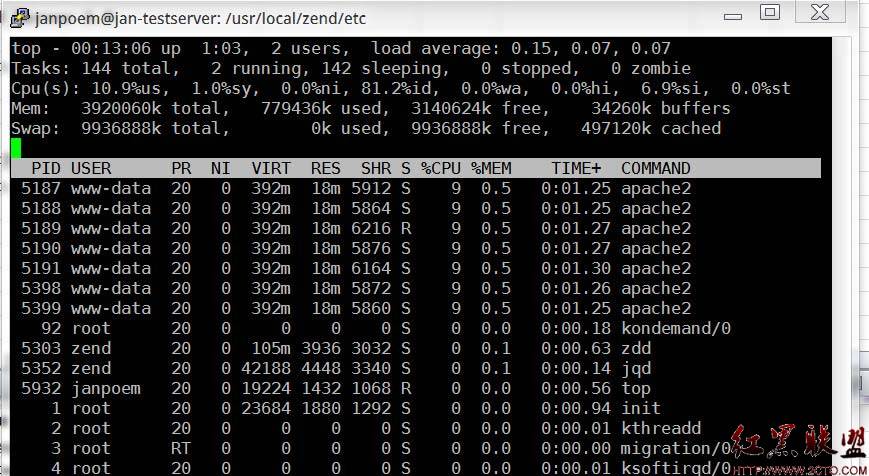
注意看上图中的zdd和jqd两个进程,这事Zend自己启动的进程,目前尚未能从官网看到任何关于他的描述。这让人感到某种隐隐的不安。 - 虽然Windows和Linux在并发测试的静态文件中,看似结果相近。但是Windows作为一个GUI的界面,需要消耗更多的系统资源(虽然也有纯DOS命令的Server 2008,但我可不是DOS粉)。而选择Server 2008,在同等配置下,运行PHP几乎损失了近一半的RPS。也就是说,你不到要交Server 2008的系统费用,同时,你还得再掏钱来补回这部分损失掉的这一半RPS。如果主要是PHP,真的不适合选择Windows作为服务器。
- 我们常常会被一些片面的测试结果所误导,误以为,Windows性能很差、Apache很慢,你甚至都能头头是道的说出个大天来,然后末了还不忘贴几个链接来强化自己的结果。但是通过今天测试的结果,我反而更加客观的看到,这四个WebServer,都是面向高并发、高负载而设计的,就这个角度而言,他们都是合格的。可是在同样合格的结果面前,我们要比较的,是他是怎么做到的,他付出多大的代价做到的,他这样做的后果是什么,而他对其所在的环境里,又有什么影响。然后,才能促成我们最终做出合适的选择。
尾声
历经2天余的折腾,针对Windows平台和Linux平台的对比测试终于告一段落了。
再次感谢Max和Sam整个过程给予的帮助,尤其是Sam,能在一下午之内在同一台机器上装好Ubuntu Server和Server 2008,多亏了他的协助。
这次测试的主要是风口浪尖中的4个主角,不过敢夸口自称性能卓越的 WebServer,仍有很多。而我,也打算继续对他们测试到底。这不,Sam又举了两个,据说其中一个是用.net实现的,支持fastcgi,我的手又痒了
摘自 曾建凯的博客
相关知识
-
linux一键安装web环境全攻略 在linux系统中怎么一键安装web环境方法
-
Linux网络基本网络配置方法介绍 如何配置Linux系统的网络方法
-
Linux下DNS服务器搭建详解 Linux下搭建DNS服务器和配置文件
-
对Linux进行详细的性能监控的方法 Linux 系统性能监控命令详解
-
linux系统root密码忘了怎么办 linux忘记root密码后找回密码的方法
-
Linux基本命令有哪些 Linux系统常用操作命令有哪些
-
Linux必学的网络操作命令 linux网络操作相关命令汇总
-
linux系统从入侵到提权的详细过程 linux入侵提权服务器方法技巧
-

linux系统怎么用命令切换用户登录 Linux切换用户的命令是什么
-
在linux中添加普通新用户登录 如何在Linux中添加一个新的用户
软件推荐
更多 >


-
1
 专为国人订制!Linux Deepin新版发布
2012-07-10
-
2
CentOS 6.3安装(详细图解教程)
-
3
Linux怎么查看网卡驱动?Linux下查看网卡的驱动程序
-
4
centos修改主机名命令
-
5
Ubuntu或UbuntuKyKin14.04Unity桌面风格与Gnome桌面风格的切换
-
6
FEDORA 17中设置TIGERVNC远程访问
-
7
StartOS 5.0相关介绍,新型的Linux系统!
-
8
解决vSphere Client登录linux版vCenter失败
-
9
LINUX最新提权 Exploits Linux Kernel <= 2.6.37
-
10
nginx在网站中的7层转发功能