Linux DHCP服务实验报告
发布时间:2014-09-05 16:48:22作者:知识屋
DHCP实验报告 --杨冬
- 实验环境
服务器:Red Hat Enterprise Linux 5.3(ip:192.168.0.20)
服务器:Red Hat Enterprise Linux 5.3(ip:192.168.0.10、192.168.1.10)
客户端:windows xp
01.安装好软件包
[root@yang ~]# rpm -ihv /media/Server/dhcp-3.0.5-18.el5.i386.rpm

- 实验目标一:配置一台DHCP服务器为局域网用户分配ip地址。
01.修改配置文件.
[root@yang ~]# cp -rf /usr/share/doc/dhcp-3.0.5/dhcpd.conf.sample /etc/dhcpd.conf
cp:是否覆盖“/etc/dhcpd.conf”? y
[root@yang ~]# vim /etc/dhcpd.conf
ddns-update-style interim;
ignore client-updates;
subnet 192.168.0.0 netmask 255.255.255.0 {
option routers 192.168.0.1;
option subnet-mask 255.255.255.0;
option nis-domain "yangdong.com";
option domain-name "yangdong.com";
option domain-name-servers 61.147.37.1;
option time-offset -18000; # Eastern Standard Time
range dynamic-bootp 192.168.0.128 192.168.0.254;
default-lease-time 21600;
max-lease-time 43200;
host ns {
next-server marvin.redhat.com;
hardware ethernet 12:34:56:78:AB:CD;
fixed-address 207.175.42.254;
}
}
02.重启服务器.
[root@yang ~]# service dhcpd restart
关闭dhcpd: [确定]
启动dhcpd: [确定]
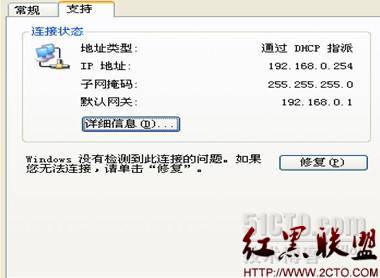
03.客户端测试

测试成功
- 实验目标二:配置实现DHCP中继代理服务.
01.实验环境:
主服务器安装: [root@yang ~]# rpm -ihv /media/Server/dhcp-3.0.5-18.el5.i386.rpm
中继服务器安装:[root@yang ~]# rpm -ihv /media/Server/dhcp-3.0.5-18.el5.i386.rpm
02.主服务器配置:
①.[root@yang ~]# vim /etc/dhcpd.conf
ddns-update-style interim;
ignore client-updates;
subnet 192.168.0.0 netmask 255.255.255.0 {
option routers 192.168.0.1;
option subnet-mask 255.255.255.0;
option nis-domain "yangdong.com";
option domain-name "yangdong.com";
option domain-name-servers 61.147.37.1;
option time-offset -18000; # Eastern Standard Time
range dynamic-bootp 192.168.0.128 192.168.0.254;
default-lease-time 21600;
max-lease-time 43200;
}
subnet 192.168.1.0 netmask 255.255.255.0 {
option routers 192.168.1.1;
option subnet-mask 255.255.255.0;
option nis-domain "yangdong.com";
option domain-name "yangdong.com";
option domain-name-servers 61.147.37.1;
option time-offset -18000; # Eastern Standard Time
range dynamic-bootp 192.168.1.128 192.168.1.254;
default-lease-time 21600;
max-lease-time 43200;
}
②.重启服务器.
[root@yang ~]# service dhcpd restart
关闭dhcpd: [确定]
启动dhcpd: [确定]
03. 中继服务器配置
①.[root@hello ~]# rpm -ihv /media/Server/dhcp-3.0.5-18.el5.i386.rpm
warning: /media/Server/dhcp-3.0.5-18.el5.i386.rpm: Header V3 DSA signature: NOKEY, key ID 37017186
Preparing... ########################################### [100%]
1:dhcp ########################################### [100%]
[root@hello ~]# service dhcpd start
启动dhcpd: [失败]

②.[root@hello ~]# vim /etc/sysctl.con
修改:net.ipv4.ip_forward = 1 //开启路由功能
[root@hello ~]# sysctl -p
net.ipv4.ip_forward = 1
net.ipv4.conf.default.rp_filter = 1
net.ipv4.conf.default.accept_source_route = 0
kernel.sysrq = 0
kernel.core_uses_pid = 1
net.ipv4.tcp_syncookies = 1
kernel.msgmnb = 65536
kernel.msgmax = 65536
kernel.shmmax = 4294967295
kernel.shmall = 268435456
③.[root@hello ~]# vim /etc/sysconfig/dhcrelay
# Command line options here
INTERFACES="eth0 eth1"
DHCPSERVERS="192.168.0.20"
[root@hello ~]# service dhcrelay start
启动dhcrelay:
[确定]
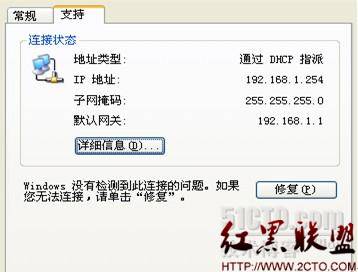
④.客户端测试

测试成功
- 实验前的准备
本文出自 “杨冬的博客”
相关知识
-

linux一键安装web环境全攻略 在linux系统中怎么一键安装web环境方法
-

Linux网络基本网络配置方法介绍 如何配置Linux系统的网络方法
-
Linux下DNS服务器搭建详解 Linux下搭建DNS服务器和配置文件
-
对Linux进行详细的性能监控的方法 Linux 系统性能监控命令详解
-
linux系统root密码忘了怎么办 linux忘记root密码后找回密码的方法
-
Linux基本命令有哪些 Linux系统常用操作命令有哪些
-
Linux必学的网络操作命令 linux网络操作相关命令汇总
-

linux系统从入侵到提权的详细过程 linux入侵提权服务器方法技巧
-

linux系统怎么用命令切换用户登录 Linux切换用户的命令是什么
-
在linux中添加普通新用户登录 如何在Linux中添加一个新的用户
软件推荐
更多 >-
1
 专为国人订制!Linux Deepin新版发布
2012-07-10
-
2
CentOS 6.3安装(详细图解教程)
-
3
Linux怎么查看网卡驱动?Linux下查看网卡的驱动程序
-
4
centos修改主机名命令
-
5
Ubuntu或UbuntuKyKin14.04Unity桌面风格与Gnome桌面风格的切换
-
6
FEDORA 17中设置TIGERVNC远程访问
-
7
StartOS 5.0相关介绍,新型的Linux系统!
-
8
解决vSphere Client登录linux版vCenter失败
-
9
LINUX最新提权 Exploits Linux Kernel <= 2.6.37
-
10
nginx在网站中的7层转发功能


