CentOS6.5安装
发布时间:2015-05-27 19:09:52作者:知识屋
1 CentOS 6.5简介
CentOS(Community Enterprise Operating System,中文意思是:社区企业操作系统)是Linux发行版之一,它是来自于Red Hat Enterprise Linux依照开放源代码规定释出的源代码所编译而成。由于出自同样的源代码,因此有些要求高度稳定性的服务器以CentOS替代商业版的Red Hat Enterprise Linux使用。两者的不同,在于CentOS并不包含封闭源代码软件。2 安装前的准备
2.1 安装前的环境介绍
1)Windows操作系统:wind7, 32位旗舰版。2)VMware版本:v10.0.1简体中文版。
3) Centos操作系统:版本6.5,32位。
2.2 CentOS 6.5下载说明
1) 下载地址:种子下载
32位下载种子文件:
http://mirror.centos.org/centos/6.5/isos/i386/CentOS-6.5-i386-bin-DVD1to2.torrent
64 位下载种子文件:
http://mirror.centos.org/centos/6.5/isos/x86_64/CentOS-6.5-x86_64-bin-DVD1to2.torrent
官方下载:
http://www.centos.org/
2) 下载文件说明:
a)CentOS 6.5系统镜像有两个,安装系统只用到第一个镜,即CentOS-6.5-i386-bin-DVD1.iso(32位)或者CentOS-6.5-x86_64-bin-DVD1.iso(64位),第二个镜像是系统自带软件安装包;
b)安装CentOS 6.5系统的计算机内存必须等于或者大于628M(最小内存628M),才能启用图形安装模式;
c)CentOS 6.5文本安装模式不支持自定义分区,建议使用图形安装模式安装;
d)CentOS 6.5的系统安装方式分为:图形安装模式和文本安装模式;
e)CentOS 6.5的系统运行方式分为:带图形界面、可以用鼠标操作的图形化方式和不带图形界面、直接用命令行操作的文本方式(具体的系统运行方式,可以在系统安装的过程中自定义选择);
2.3安装注意
1) 安装注意:a) 在VMware中安装CentOS的时候,Windows的操作系统必须和CentOS操作系统的位数一致。即widows是32的CentOS必须是32位的。如果wiondws是64位的CentOS也必须是64位的。
b)在VMware安装CentOS如果页面中显示不出下一步。可以一点击开机后,立马点击全屏按钮。下一步的按钮即可在页面中显示。
c)CentOS 6.5系统镜像有32位和64位两个版本,生产服务器如果是大内存(4G以上内存)建议安装64位版本CentOS-6.5-x86_64-bin-DVD1.iso。即如果是给服务器安装CentOS时候,如果内存大于4G的话,建议安装CentOS64位的操作系统。
3 安装步骤
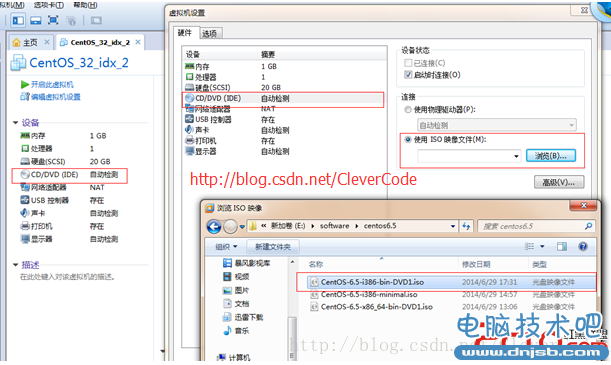
1)加载镜像文件。这里介绍的是虚拟机的安装CentOS6.5,如果是服务器的安装,用U盘启动安装,或者推入光盘安装。新建好一个CentOS虚拟机后,点击CD光驱部分,将镜像文件放入到光驱中。
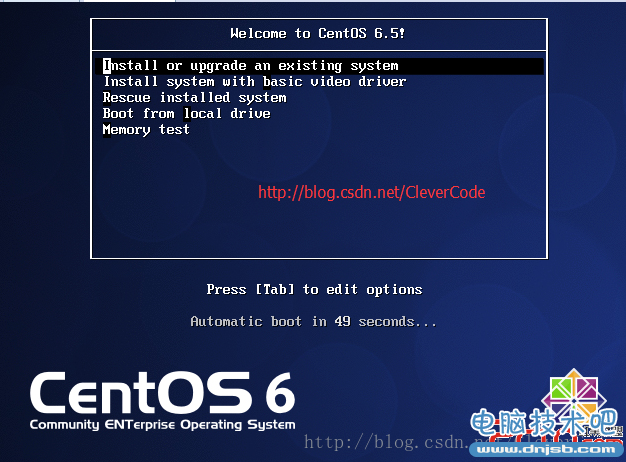
2)安装模式:
a)模式说明:
Install or upgrade an existing system 安装或升级现有的系统
install system with basic video driver 安装过程中采用 基本的显卡驱动
Rescue installed system 进入系统修复模式
Boot from local drive 退出安装从硬盘启动
Memory test 内存检测
b)设置:
这里选择第一项: Install or upgrade an existing system
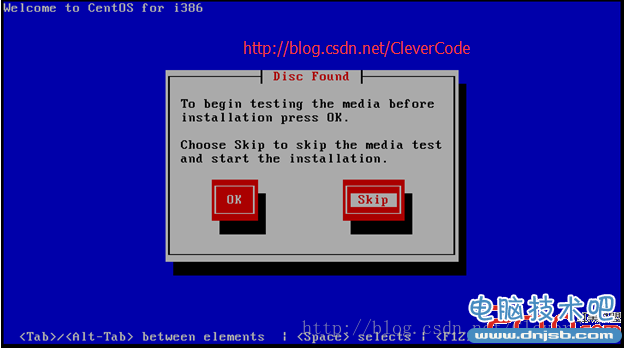
3)是否对CD媒体进行测试 。这里选择skip跳过。
4) 出现以下页面,点击next。
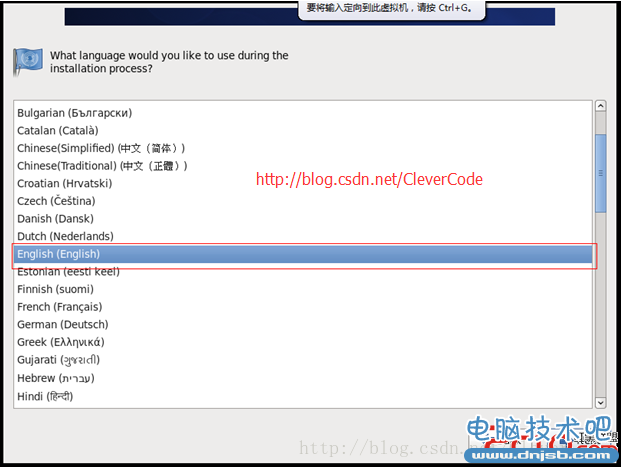
5)语言选择。选择语言为:English(English),服务器安装建议安装英文版本,如果为选择中文容易出现乱码。
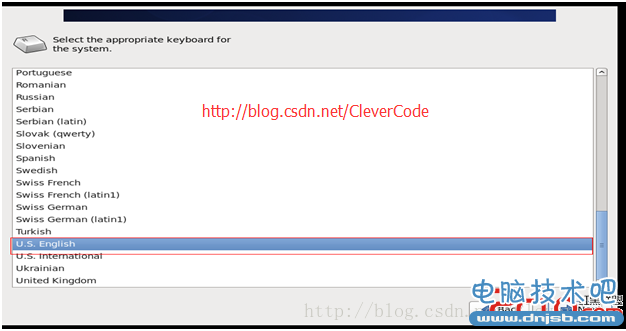
6)键盘选择。键盘选择为:U.S.English。
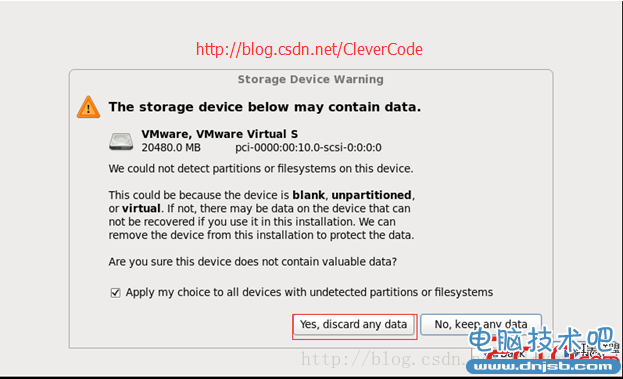
7)存储方式。选择第一项: 选择第一项,基本存储设备

8)数据保留方式。选择第一项:yes,discard any data.(是,忽略所有数据)
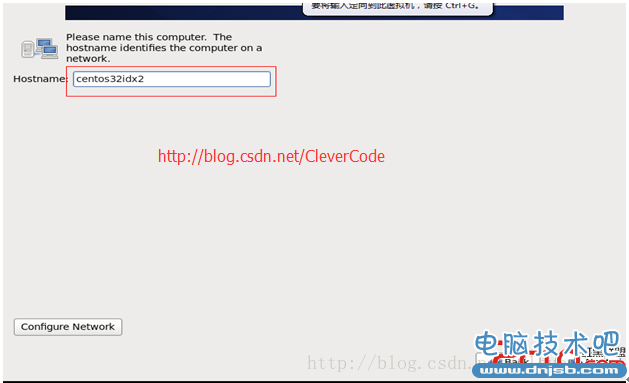
9)设置主机名。
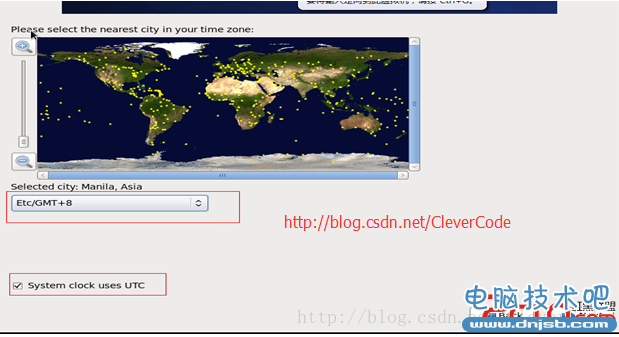
10)设置时区。时区选择:Etc/GMT +8 北京时区,"System clock user UTC" 前面打勾,使用UTC时间.
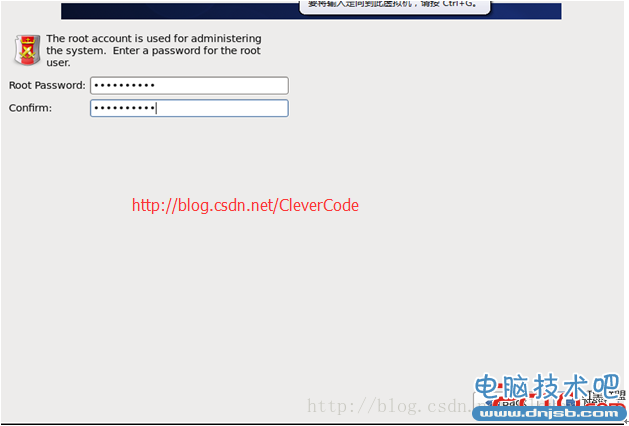
11)设置root密码。
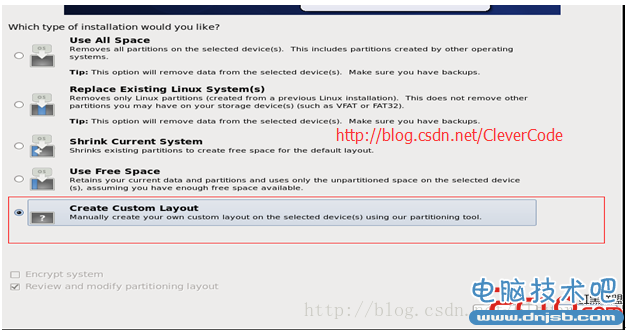
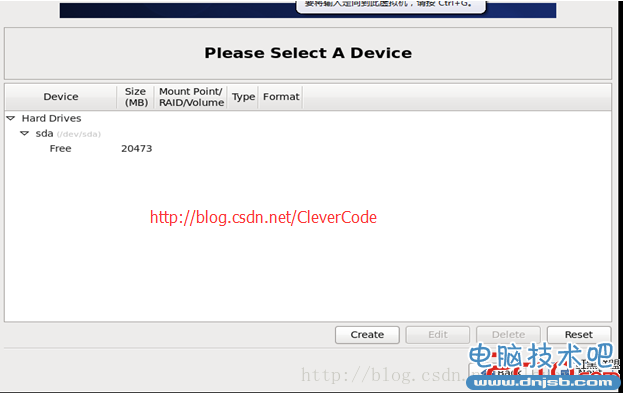
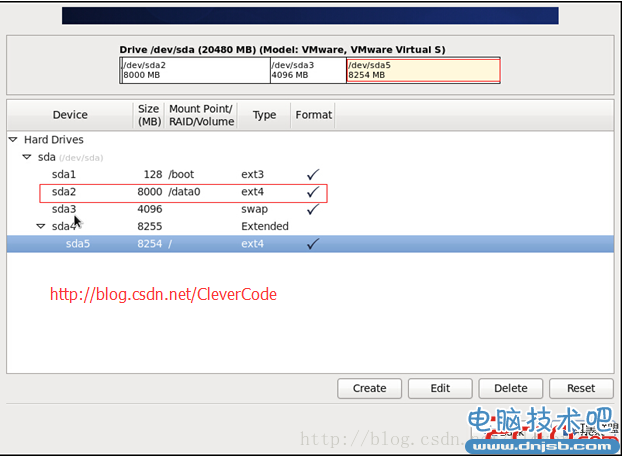
12)分区方式。这里选择最后一项: Create Custom Layout 创建自定义分区。
13) 分区设置。
特别说明:
用于正式生产的服务器,切记必须把数据盘单独分区,防止系统出问题时,保证数据的完整性。比如可以再划分一个/data专门用来存放数据。具体分区配置可以参考后续博客。对于大内存服务器,可以不用设置swap分区,或者在确定系统需要使用的内存大小后,再增加swap。
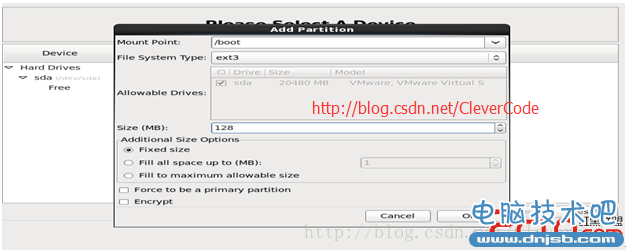
14)设置boot分区。
1)配置说明:
挂载点:/boot
文件系统类型:ext3
大小Size:128
其他选项默认即可
2)操作说明:
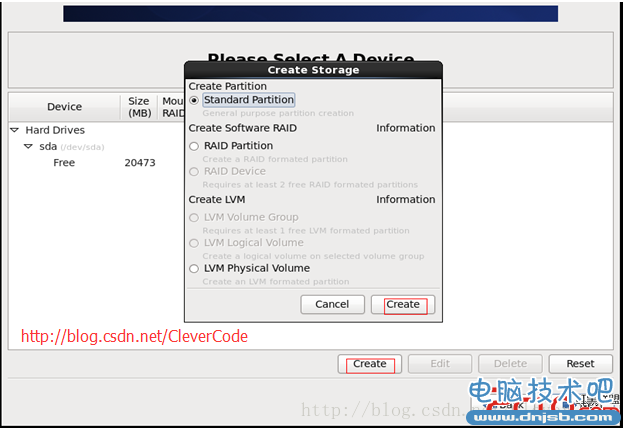
选中空闲分区Free,点创建Create;选择标准分区Standard Partition,点创建Create.
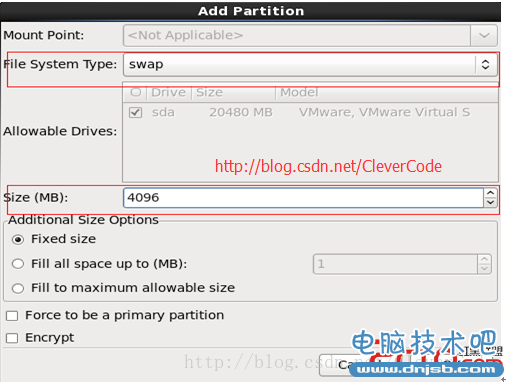
15)设置swap分区。服务器安装时,Swap分区可以先不配置。
配置说明:
文件系统类型 选择 swap(交换分区)
大小: 4096 (一般为内存的2倍)
其他选项默认即可
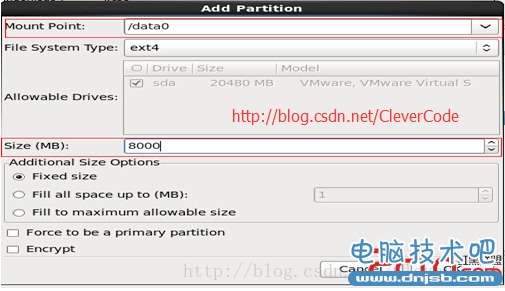
16) 配置/data0分区,该分区可以存放web的应用程序文件,脚本,图片等等。
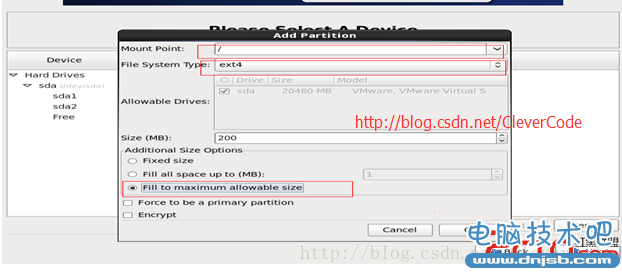
17)配置跟挂载节点。
配置说明:
挂载点:/
文件系统类型:ext4
选中“使用全部可用空间”
其他选项默认即可
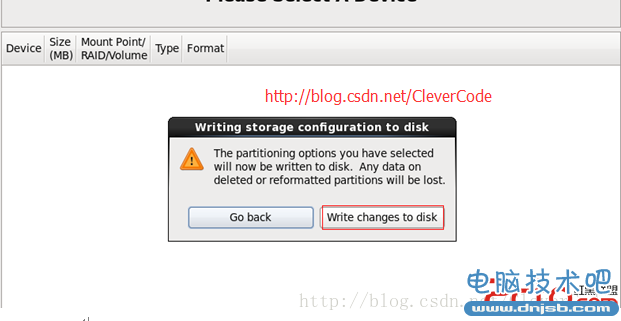
18)格式化分区。点“Format”格式化。
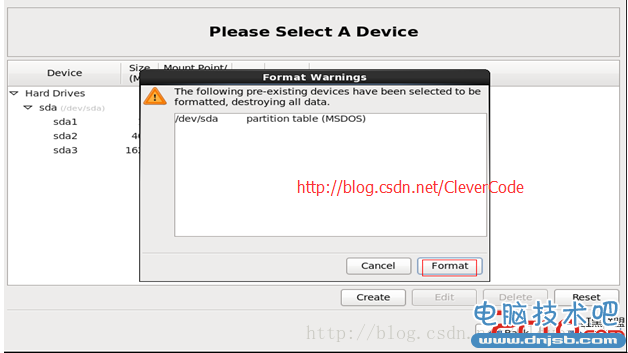
19)将修改写入磁盘。选择“Write changes to disk”将修改写入磁盘。
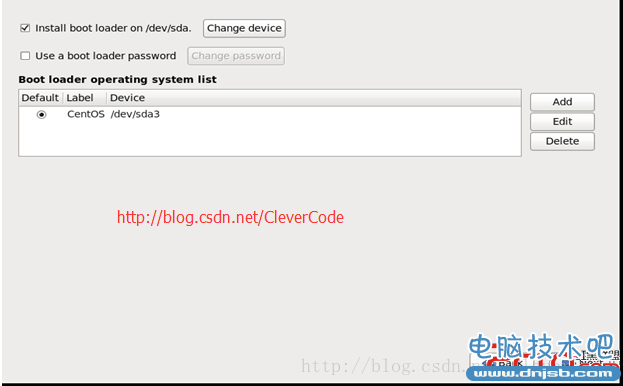
20)启动选择。这里默认next。
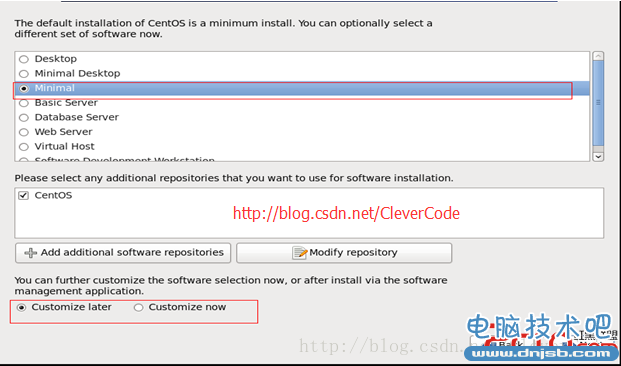
21)选择安装包。这里选择最小化安装。
这里选择:Minimal 最小
备注:可以点Customize now,选择安装需要的开发工具包软件,
也可以在需要的时候通过yum源、rpm或者编译来安装软件包。
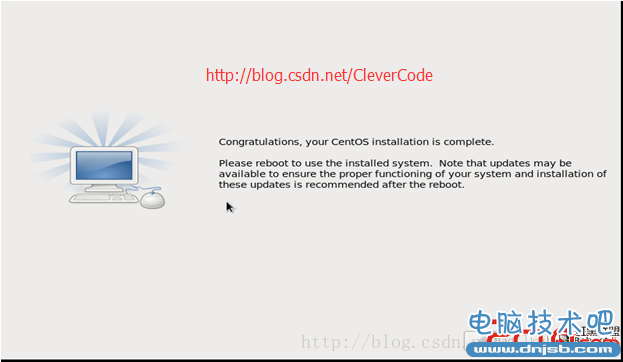
22)重启完成系统安装。
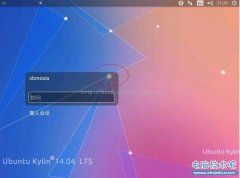
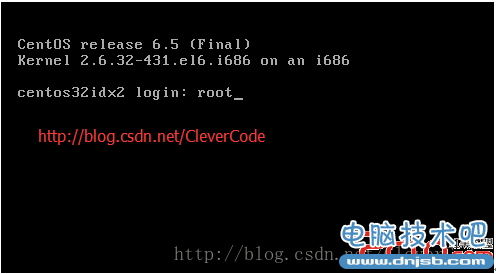
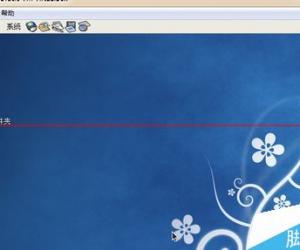
23)登录页面图。
相关知识
-
linux一键安装web环境全攻略 在linux系统中怎么一键安装web环境方法
-
Linux网络基本网络配置方法介绍 如何配置Linux系统的网络方法
-
Linux下DNS服务器搭建详解 Linux下搭建DNS服务器和配置文件
-
对Linux进行详细的性能监控的方法 Linux 系统性能监控命令详解
-
linux系统root密码忘了怎么办 linux忘记root密码后找回密码的方法
-
Linux基本命令有哪些 Linux系统常用操作命令有哪些
-
Linux必学的网络操作命令 linux网络操作相关命令汇总
-
linux系统从入侵到提权的详细过程 linux入侵提权服务器方法技巧
-
linux系统怎么用命令切换用户登录 Linux切换用户的命令是什么
-
在linux中添加普通新用户登录 如何在Linux中添加一个新的用户
软件推荐
更多 >


-
1
 专为国人订制!Linux Deepin新版发布
2012-07-10
-
2
CentOS 6.3安装(详细图解教程)
-
3
Linux怎么查看网卡驱动?Linux下查看网卡的驱动程序
-
4
centos修改主机名命令
-
5
Ubuntu或UbuntuKyKin14.04Unity桌面风格与Gnome桌面风格的切换
-
6
FEDORA 17中设置TIGERVNC远程访问
-
7
StartOS 5.0相关介绍,新型的Linux系统!
-
8
解决vSphere Client登录linux版vCenter失败
-
9
LINUX最新提权 Exploits Linux Kernel <= 2.6.37
-
10
nginx在网站中的7层转发功能