上报服务系统开发(详细源码)
发表时间:2022-03-24来源:网络

上报系统:java工程,SpringBoot框架
1.Spring Boot简介
Spring Boot是一个基于Spring之上的快速应用构建框架。使用Spring Boot可以快速开发出基于Spring的应用。Spring Boot主要解决两方面的问题。
依赖太多问题
轻量级JavaEE开发,需要导入大量的依赖
依赖之间还存在版本冲突
配置太多问题
大量的XML配置Spring Boot内部整合了大量的依赖,而且经过大量测试,选择的依赖都是没有版本冲突的。Spring Boot简化了大量的配置,通过少量的配置,就可以让程序工作。
开发Spring Boot程序的基本步骤
导入Spring Boot依赖(起步依赖)编写application.properties配置文件编写Application入口程序2.导入Maven依赖
主要导入以下依赖:
导入Spring Boot依赖操作JSON导入FastJSON依赖导入Kafka依赖 org.springframework.boot spring-boot-starter-parent 1.5.13.RELEASE com.xu.flinkpyg report 0.0.1-SNAPSHOT report Demo project for Spring Boot 4.0.0 UTF-8 UTF-8 1.8 org.springframework.boot spring-boot-starter-web org.springframework.boot spring-boot-starter-test com.alibaba fastjson 1.2.47 org.springframework.kafka spring-kafka 1.0.6.RELEASE com.rabbitmq http-client 2.0.1.RELEASE org.springframework.boot spring-boot-maven-plugin3. 创建项目包结构
包名说明com.xu.report.controller存放Spring MVC的controllercom.xu.report.bean存放相关的Java Bean实体类com.xu.report.util用来存放相关的工具类4.验证Spring Boot工程是否创建成功
步骤

http://127.0.0.1:8080/test?json=1212
结果: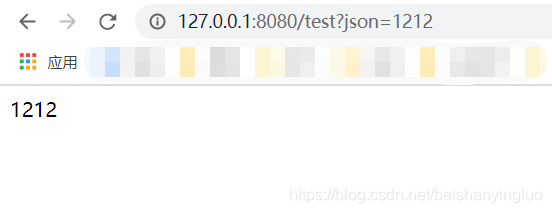
五 安装Kafka-Manager
Kafka-manager是Yahoo!开源的一款Kafka监控管理工具。
资料:
链接:https://pan.baidu.com/s/18iC5OsAloqeu_6X7-cPcTQ
提取码:n40p
安装步骤
上传资料\软件包中的kafka-manager-1.3.3.7.tar.gz
解压到/export/servers
tar -zxf kafka-manager-1.3.3.7.tar.gz -C /export/servers/修改conf/application.conf
kafka-manager.zkhosts="node01:2181,node02:2181,node03:2181"启动zookeeper
cd /export/servers/zookeeper-3.4.5-cdh5.14.0 bin/zkServer.sh start启动kafka
# 启动3台机器的Kafka cd /export/servers/kafka_2.11-0.10.1.0 bin/kafka-server-start.sh config/server.properties > /dev/null 2>&1 &直接运行bin/kafka-manager
cd /export/servers/kafka-manager-1.3.3.7 nohup bin/kafka-manager 2>&1 &浏览器中使用node01:9000访问即可
默认kafka-manager的端口号为9000,如果该端口被占用,请使用下面的命令修改端口
bin/kafka-manager -Dconfig.file=/export/servers/kafka-manager-1.3.3.7/conf/application.conf -Dhttp.port=100866 编写Kafka生产者配置工具类
由于我们项目要操作Kafka, 我们先来构建出KafkaTemplate, 这是一个Kafka的模板对象, 通过它我们可以很方便的发送消息到Kafka.
开发步骤
编写Kafka生产者配置编写Kafka生产者SpringBoot配置工具类KafkaProducerConfig,构建KafkaTemplate实现
导入Kafka生产者配置文件
将下面的代码拷贝到application.properties中
# # kakfa # #kafka的服务器地址 kafka.bootstrap_servers_config=node01:9092,node02:9092,node03:9092 #如果出现发送失败的情况,允许重试的次数 kafka.retries_config=0 #每个批次发送多大的数据 kafka.batch_size_config=4096 #定时发送,达到1ms发送 kafka.linger_ms_config=1 #缓存的大小 kafka.buffer_memory_config=40960 #TOPIC的名字 kafka.topic=pyg >**定时定量** > >1. kafka生产者发送一批数据的大小:kafka.producer.batch.size=4096 (单位:字节) > > 实际环境可以调大一些,提高效率 > >2. 定时发送:kafka.producer.linger=1 > > 达到一毫秒后发送编写KafkaProducerConfig,主要创建KafkaTemplate,用于发送Kafka消息
使用@Value("${配置项}")来读取配置构建DefaultKafkaProducerFactory构建KafkaTemplate@Configuration public class KafkaConfig { @Value("${kafka.bootstrap_servers_config}") private String bootstrap_servers_config; @Value("${kafka.retries_config}") private int retries_config; @Value("${kafka.batch_size_config}") private int batch_size_config; @Value("${kafka.linger_ms_config}") private int linger_ms_config; @Value("${kafka.buffer_memory_config}") private int buffer_memory_config; @Bean public KafkaTemplate kafkaTemplate() { Map configs = new HashMap(); configs.put(ProducerConfig.BOOTSTRAP_SERVERS_CONFIG, bootstrap_servers_config); configs.put(ProducerConfig.RETRIES_CONFIG, retries_config); configs.put(ProducerConfig.BATCH_SIZE_CONFIG, batch_size_config); configs.put(ProducerConfig.LINGER_MS_CONFIG, linger_ms_config); configs.put(ProducerConfig.BUFFER_MEMORY_CONFIG, buffer_memory_config); configs.put(ProducerConfig.PARTITIONER_CLASS_CONFIG, RoundRobinPartitioner.class); configs.put(ProducerConfig.KEY_SERIALIZER_CLASS_CONFIG, StringSerializer.class); configs.put(ProducerConfig.VALUE_SERIALIZER_CLASS_CONFIG, StringSerializer.class); ProducerFactory producerFactory = new DefaultKafkaProducerFactory(configs); return new KafkaTemplate(producerFactory); } }在test测试源码中创建一个Junit测试用例
整合Spring Boot Test
注入KafkaTemplate
测试发送100条消息到testtopic
@RunWith(SpringRunner.class) @SpringBootTest public class KafkTest { @Autowired private KafkaTemplate kafkaTemplate; @Test public void sendTest01() { for(int i = 0; i // 消息次数 private int count; // 消息的时间戳 private long timeStamp; // 消息体 private String message; public int getCount() { return count; } public void setCount(int count) { this.count = count; } public long getTimeStamp() { return timeStamp; } public void setTimeStamp(long timeStamp) { this.timeStamp = timeStamp; } public String getMessage() { return message; } public void setMessage(String message) { this.message = message; } @Override public String toString() { return "Message{" + "count=" + count + ", timeStamp=" + timeStamp + ", message='" + message + '\'' + '}'; } }在com.xu.report.controller包下创建ReportController类
编写receiveDataHandler接收从客户端JSON数据,并将响应结果封装到Map结构中,返回给客户端注意:接收JSON数据要在参数前面添加@Re注解将接收的参数封装到Message实体类使用FastJSON将Message实体类对象转换为JSON字符串将JSON字符串发送到Kafka的pygtopic将响应结果封装到Map结构中,返回给客户端
注意:
在ReportController类上要添加@RestController注解需要添加@AutoWired注解来注入KafkaTemplate请求参数上要加上@Re注解 ReportController.java
package com.xu.report.controller; import com.alibaba.fastjson.JSON; import com.xu.report.bean.Message; import org.springframework.beans.factory.annotation.Autowired; import org.springframework.kafka.core.KafkaTemplate; import org.springframework.web.bind.annotation.Re; import org.springframework.web.bind.annotation.Re; import org.springframework.web.bind.annotation.RestController; import java.util.HashMap; import java.util.Map; @RestController public class ReportController { @Autowired KafkaTemplate kafkaTemplate; @Re("/receive") public Map receive(@Re String json) { Map map = new HashMap(); try { //构建Message Message msg = new Message(); msg.setMessage(json); msg.setCount(1); msg.setTimeStamp(System.currentTimeMillis()); String msgJson = JSON.toJSONString(msg); //发送Message到kafka kafkaTemplate.send("pyg", msgJson); map.put("success", "true"); } catch (Exception ex) { ex.printStackTrace(); map.put("success", "false"); } return map; } }9 模拟生产点击流日志消息到Kafka
为了方便进行测试,我们可以使用一个消息生成工具来生成点击流日志,然后发送给上报服务系统。该消息生成工具可以一次生成100条ClickLog信息,并转换成JSON,通过HttpClient把消息内容发送到我们编写好的ReportController。

步骤
编写ClickLog实体类(ClickLog.java)编写点击流日志生成器(ClickLogGenerator.java)package com.xu.report.bean; public class ClickLog { //频道ID private long channelID ; //产品的类别ID private long categoryID ; //产品ID private long produceID ; //用户的ID private long userID ; //国家 private String country ; //省份 private String province ; //城市 private String city ; //网络方式 private String network ; //来源方式 private String source ; //浏览器类型 private String browserType; //进入网站时间 private Long entryTime ; //离开网站时间 private long leaveTime ; public long getChannelID() { return channelID; } public void setChannelID(long channelID) { this.channelID = channelID; } public long getCategoryID() { return categoryID; } public void setCategoryID(long categoryID) { this.categoryID = categoryID; } public long getProduceID() { return produceID; } public void setProduceID(long produceID) { this.produceID = produceID; } public String getCountry() { return country; } public void setCountry(String country) { this.country = country; } public String getProvince() { return province; } public void setProvince(String province) { this.province = province; } public String getCity() { return city; } public void setCity(String city) { this.city = city; } public String getNetwork() { return network; } public void setNetwork(String network) { this.network = network; } public String getSource() { return source; } public void setSource(String source) { this.source = source; } public String getBrowserType() { return browserType; } public void setBrowserType(String browserType) { this.browserType = browserType; } public Long getEntryTime() { return entryTime; } public void setEntryTime(Long entryTime) { this.entryTime = entryTime; } public long getLeaveTime() { return leaveTime; } public void setLeaveTime(long leaveTime) { this.leaveTime = leaveTime; } public long getUserID() { return userID; } public void setUserID(long userID) { this.userID = userID; } @Override public String toString() { return "ClickLog{" + "channelID=" + channelID + ", categoryID=" + categoryID + ", produceID=" + produceID + ", country='" + country + '\'' + ", province='" + province + '\'' + ", city='" + city + '\'' + ", network='" + network + '\'' + ", source='" + source + '\'' + ", browserType='" + browserType + '\'' + ", entryTime=" + entryTime + ", leaveTime=" + leaveTime + ", userID=" + userID + '}'; } } package com.xu.report.util; import com.alibaba.fastjson.JSONObject; import com.xu.report.bean.ClickLog; import org.apache.http.HttpResponse; import org.apache.http.HttpStatus; import org.apache.http.client.methods.HttpPost; import org.apache.http.entity.StringEntity; import org.apache.http.impl.client.CloseableHttpClient; import org.apache.http.impl.client.HttpClientBuilder; import org.apache.http.util.EntityUtils; import org.junit.Test; import java.text.DateFormat; import java.text.ParseException; import java.text.SimpleDateFormat; import java.util.ArrayList; import java.util.Date; import java.util.List; import java.util.Random; /** * 点击流日志模拟器 */ public class ClickLogGenerator { private static Long[] channelID = new Long[]{1l,2l,3l,4l,5l,6l,7l,8l,9l,10l,11l,12l,13l,14l,15l,16l,17l,18l,19l,20l};//频道id集合 private static Long[] categoryID = new Long[]{1l,2l,3l,4l,5l,6l,7l,8l,9l,10l,11l,12l,13l,14l,15l,16l,17l,18l,19l,20l};//产品类别id集合 private static Long[] produceID = new Long[]{1l,2l,3l,4l,5l,6l,7l,8l,9l,10l,11l,12l,13l,14l,15l,16l,17l,18l,19l,20l};//产品id集合 private static Long[] userID = new Long[]{1l,2l,3l,4l,5l,6l,7l,8l,9l,10l,11l,12l,13l,14l,15l,16l,17l,18l,19l,20l};//用户id集合 /** * 地区 */ private static String[] contrys = new String[]{"china"};//地区-国家集合 private static String[] provinces = new String[]{"HeNan","HeBei"};//地区-省集合 private static String[] citys = new String[]{"ShiJiaZhuang","ZhengZhou", "LuoYang"};//地区-市集合 /** *网络方式 */ private static String[] networks = new String[]{"电信","移动","联通"}; /** * 来源方式 */ private static String[] sources = new String[]{"直接输入","百度跳转","360搜索跳转","必应跳转"}; /** * 浏览器 */ private static String[] browser = new String[]{"火狐","qq浏览器","360浏览器","谷歌浏览器"}; /** * 打开时间 离开时间 */ private static List usetimelog = producetimes(); //获取时间 public static List producetimes(){ List usetimelog = new ArrayList(); for(int i=0;i DateFormat dateFormat = new SimpleDateFormat("yyyy-MM-dd hh:mm:ss:SSS"); try { Date date = dateFormat.parse(time); long timetemp = date.getTime(); Random random = new Random(); int randomint = random.nextInt(10); long starttime = timetemp - randomint*3600*1000; long endtime = starttime + randomint*3600*1000; return new Long[]{starttime,endtime}; } catch (ParseException e) { e.printStackTrace(); } return new Long[]{0l,0l}; } /** * 模拟发送Http请求到上报服务系统 * @param url * @param json */ public static void send(String url, String json) { try { CloseableHttpClient httpClient = HttpClientBuilder.create().build(); HttpPost post = new HttpPost(url); JSONObject response = null; try { StringEntity s = new StringEntity(json.toString(), "utf-8"); s.setContentEncoding("utf-8"); // 发送json数据需要设置contentType s.setContentType("application/json"); post.setEntity(s); HttpResponse res = httpClient.execute(post); if (res.getStatusLine().getStatusCode() == HttpStatus.SC_OK) { // 返回json格式: String result = EntityUtils.toString(res.getEntity()); System.out.println(result); } } catch (Exception e) { throw new RuntimeException(e); } } catch (Exception e) { e.printStackTrace(); } } public static void main(String[] args) { Random random = new Random(); for (int i = 0; i Thread.sleep(100); } catch (InterruptedException e) { e.printStackTrace(); } send("http://localhost:8888/receive", jonstr); } } }点击流日志字段
字段说明channelID频道IDcategoryID产品的类别IDproduceID产品IDcountry国家province省份city城市network网络方式(移动、联通、电信…)source来源方式browserType浏览器类型entryTime进入网站时间leaveTime离开网站时间userID用户ID10 验证测试代码
步骤
创建Kafka的topic(pyg)使用kafka-console-consumer.sh消费 topic中的数据启动上报服务执行ClickLogGenerator的main方法,生成一百条用户浏览消息到Kafka实现
创建kafka topic
bin/kafka-topics.sh --create --zookeeper node01:2181/kafka --replication-factor 2 --partitions 3 --topic pyg启动kafka消费者
bin/kafka-console-consumer.sh --zookeeper node01:2181/kafka --from-beginning --topic pyg执行程序
启动SpringBoot项目;
执行ClickLogGenerator中的main方法
结果:


注意:
1.程序的端口是否对应;
2.kafka-manager没有正常关闭,启动失败,
查看一下:
一般删除 kafka-manager-1.3.3.7目录下的RUNNING_PID,再次启动即可!!
上一篇:【干货】java核心知识整理
下一篇:微信小程序视频直播开发实现流程
知识阅读


软件推荐
更多 >-
 查看
查看皓盘云建最新版下载v9.0 安卓版
53.38MB |商务办公
-
 查看
查看ris云客移动销售系统最新版下载v1.1.25 安卓手机版
42.71M |商务办公
-
 查看
查看粤语翻译帮app下载v1.1.1 安卓版
60.01MB |生活服务
-
 查看
查看人生笔记app官方版下载v1.19.4 安卓版
125.88MB |系统工具
-
 查看
查看萝卜笔记app下载v1.1.6 安卓版
46.29MB |生活服务
-
 查看
查看贯联商户端app下载v6.1.8 安卓版
12.54MB |商务办公
-
 查看
查看jotmo笔记app下载v2.30.0 安卓版
50.06MB |系统工具
-
 查看
查看鑫钜出行共享汽车app下载v1.5.2
44.7M |生活服务
精选栏目
热门推荐


-
1
 联想笔记本电脑清理灰尘详细步骤
2022-03-26
-
2
 神舟bios设置图解教程
2022-03-26
-
3
 联想拯救者R7000 2020款清灰教程及对硅脂or导热垫选择参考建议
2022-03-26
-
4
 联想ThinkPad笔记本win10改win7系统及BIOS设置图文教程
2022-03-26
-
5
 ACPI是什么?BIOS中怎么设置ACPI?
2022-03-26
-
6
 联想ThinkPad笔记本装win10系统及bios设置教程(附带分区教程)
2022-03-26
-
7
 鸿蒙系统能安装vscode吗
2022-03-26
-
8
 192.168.1.62登录入口管理网址
2022-03-26
-
9
 fast路由器设置网址192.168.1.1,falogin.cn密码
2022-02-15
-
10
 联想笔记本装系统怎么进入PE图文教程
2022-02-14


-
1

-
2
机器人战斗竞技场手机版下载v3.71 安卓版
其它手游 -
3
果冻人大乱斗最新版下载v1.1.0 安卓版
其它手游 -
4
王者100刀最新版下载v1.2 安卓版
其它手游 -
5
trueskate真实滑板正版下载v1.5.102 安卓版
其它手游 -
6
矢量跑酷2最新版下载v1.2.1 安卓版
其它手游 -
7
休闲解压合集下载v1.0.0 安卓版
其它手游 -
8
指尖游戏大师最新版下载v4.0.0 安卓版
其它手游 -
9
飞天萌猫下载v3.0.3 安卓版
其它手游 -
10
火柴人越狱大逃脱下载v1.1 安卓版
其它手游